Website: https://dev.azure.com/
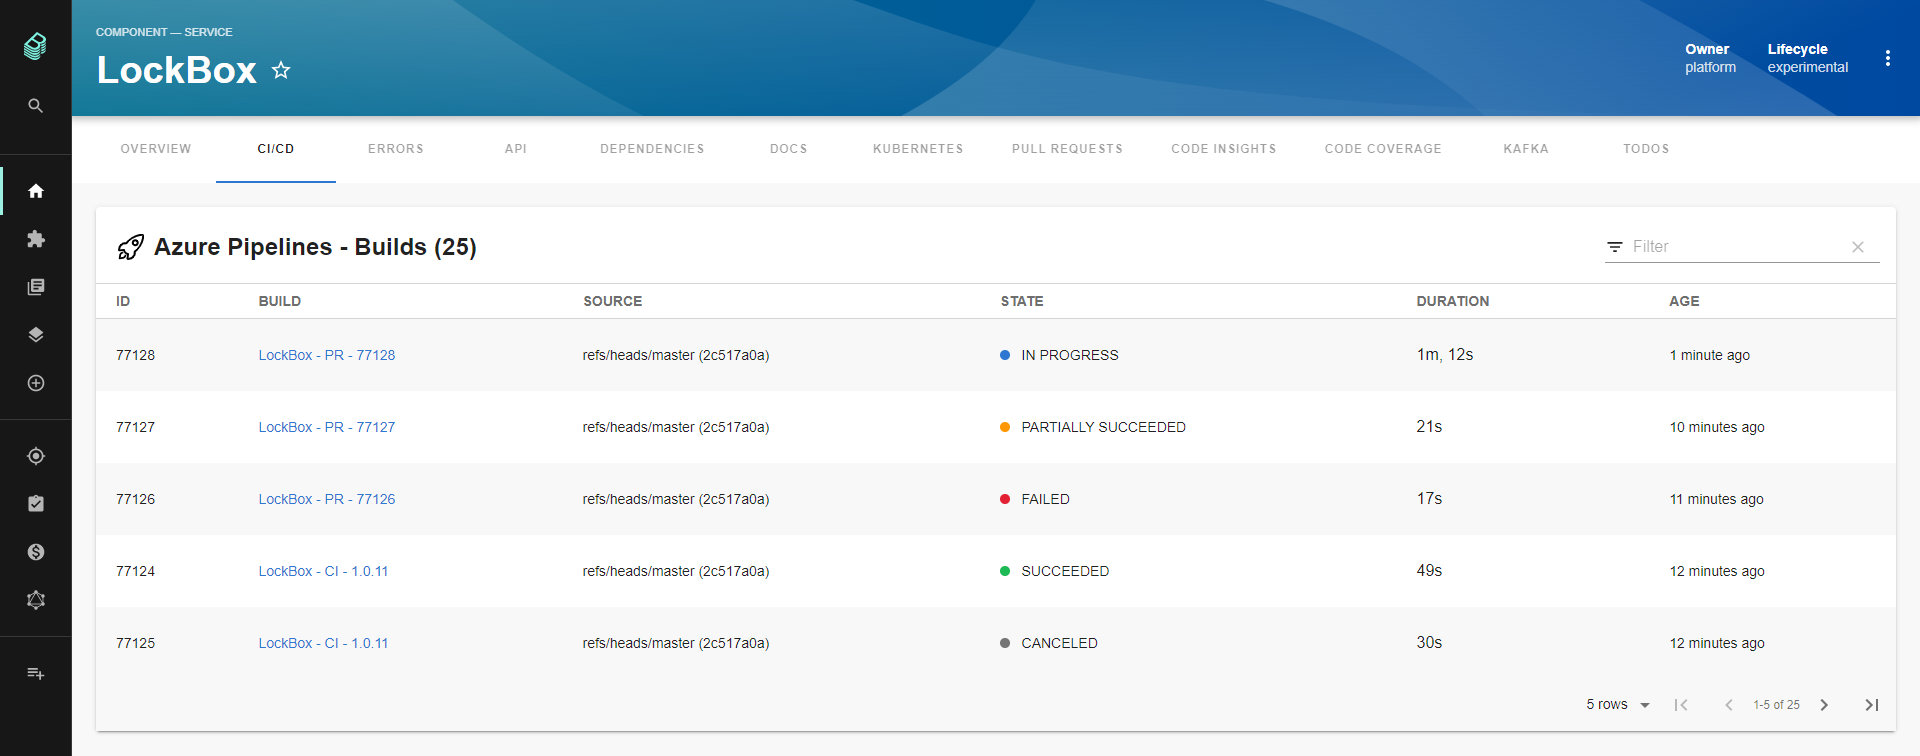
Lists the top n builds for a given Azure Repo where n is a configurable value
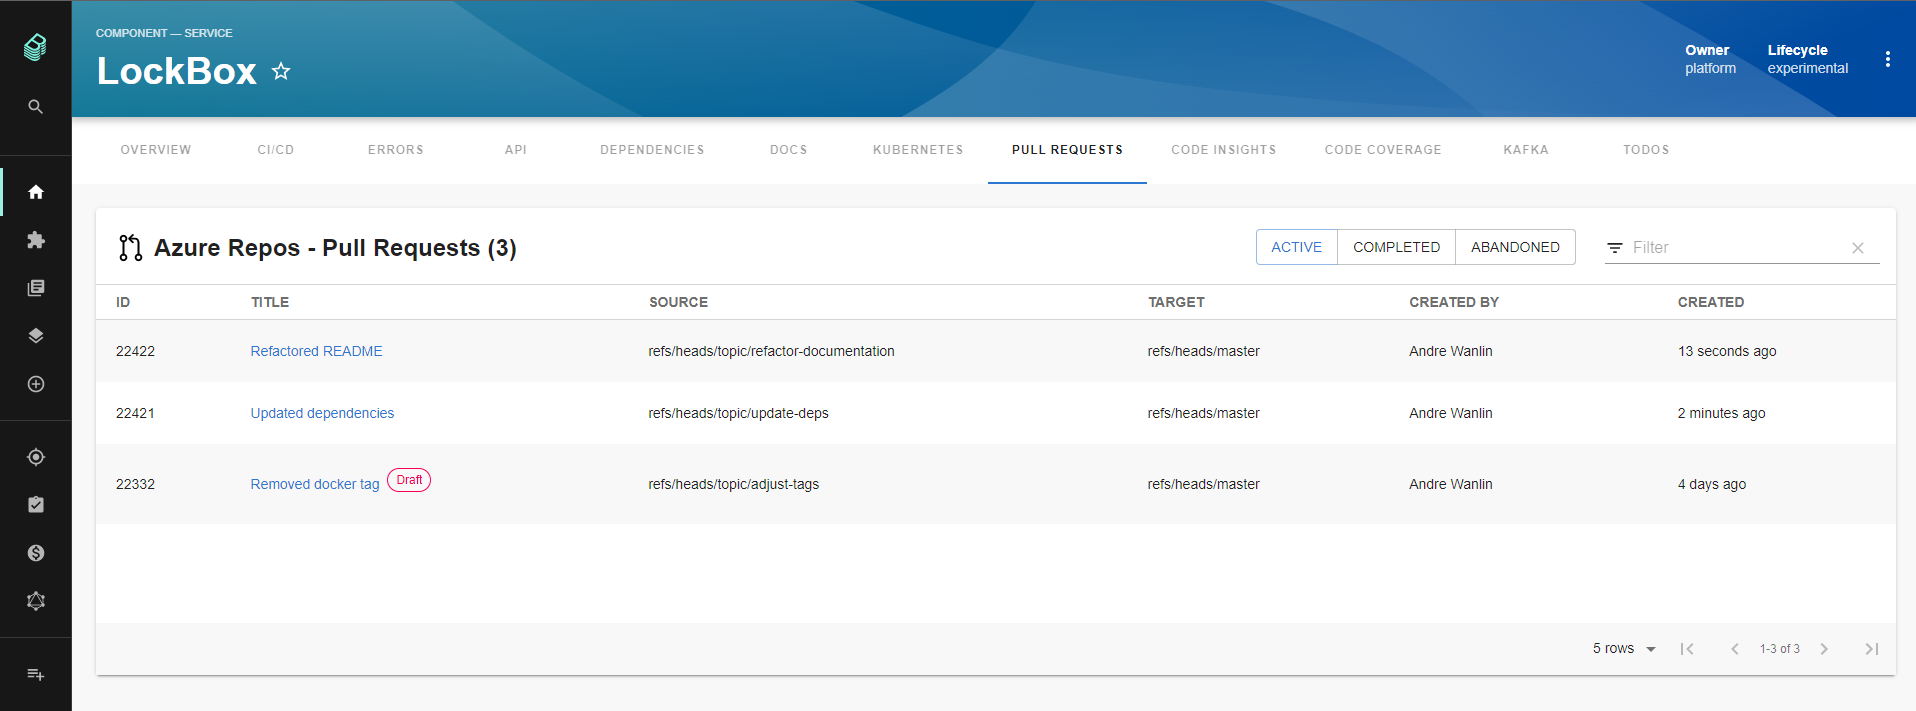
Lists the top n Active, Completed, or Abandoned Pull Requests for a given repository where n is a configurable value
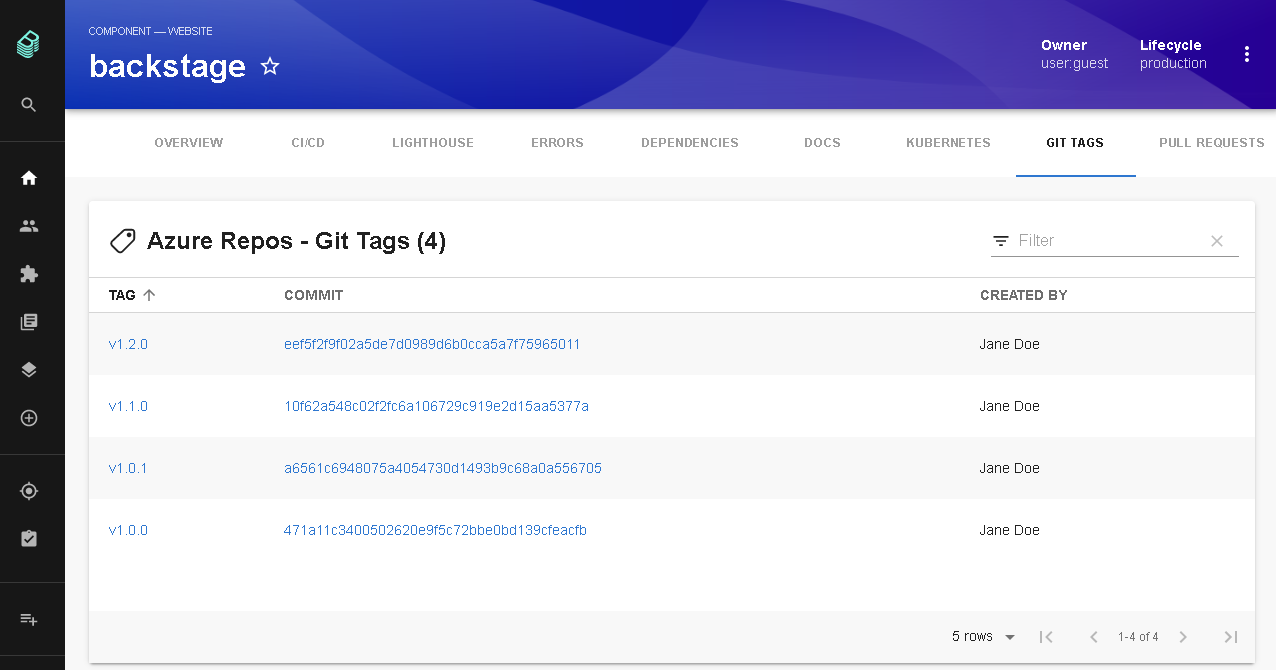
Lists all Git Tags for a given repository
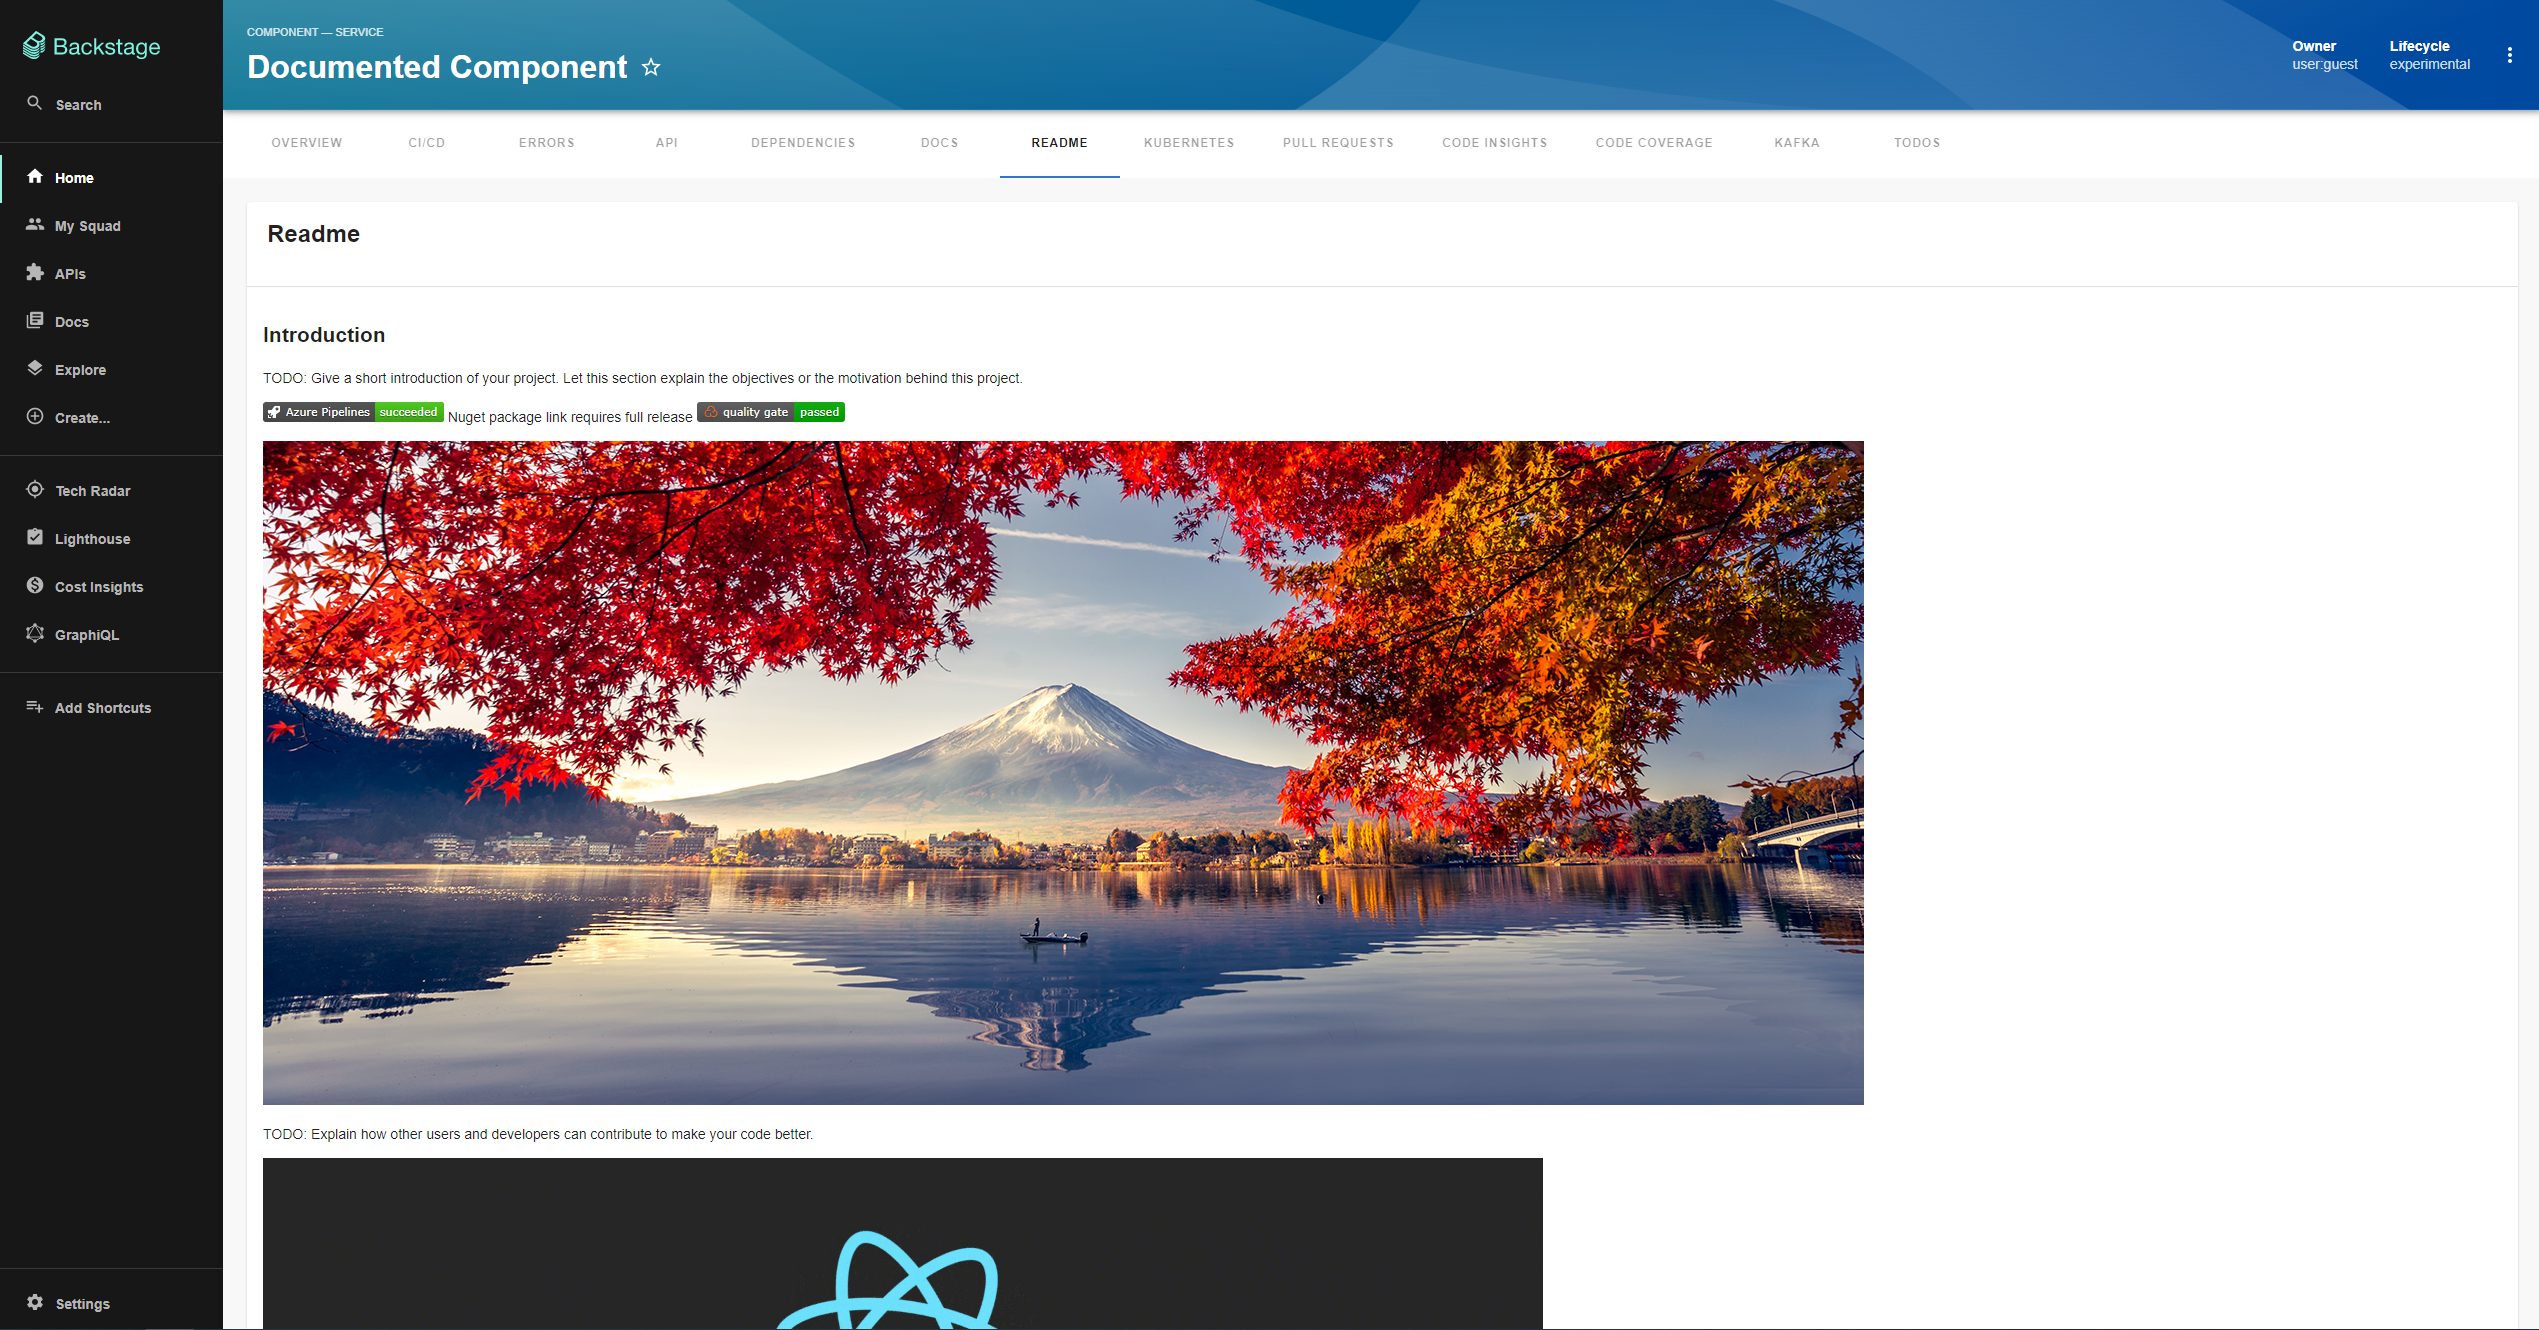
Readme for a given repository
The following sections will help you get the Azure DevOps plugin setup and running
You need to setup the Azure DevOps backend plugin before you move forward with any of these steps if you haven't already
To be able to use the Azure DevOps plugin you need to add the following annotation to any entities you want to use it with:
dev.azure.com/project-repo: <project-name>/<repo-name>Let's break this down a little: <project-name> will be the name of your Team Project and <repo-name> will be the name of your repository which needs to be part of the Team Project you entered for <project-name>.
Here's what that will look like in action:
# Example catalog-info.yaml entity definition file
apiVersion: backstage.io/v1alpha1
kind: Component
metadata:
  # ...
  annotations:
    dev.azure.com/project-repo: my-project/my-repo
spec:
  type: service
# ...If you have multiple entities within a single repo, you will need to specify which pipelines belong to each entity, like this:
dev.azure.com/project-repo: <my-project>/<my-repo>
dev.azure.com/build-definition: <build-definition-name>
Then to display the README file that belongs to each entity you would do this:
dev.azure.com/readme-path: /<path-to>/<my-readme-file>.mdIf your pipeline is in a different project to the source code, you will need to specify this in the project annotation.
dev.azure.com/project-repo: <project-with-source-code>/<my-repo>
dev.azure.com/build-definition: <build-definition-name>
dev.azure.com/project: <project-with-build-code>If you are only using Azure Pipelines along with a different SCM tool then you can use the following two annotations to see Builds:
dev.azure.com/project: <project-name>
dev.azure.com/build-definition: <build-definition-name>
In this case <project-name> will be the name of your Team Project and <build-definition-name> will be the name of the Build Definition you would like to see Builds for, and it's possible to add more Builds separated by a comma. If the Build Definition name has spaces in it make sure to put quotes around it.
If you have multiple organizations you'll need to also add this annotation:
dev.azure.com/host-org: <host>/<organization>For this annotation <host> will match the host value in the integrations.azure section in your app-config.yaml and <organization> will be the name of the Organization that is part of the host. Let's break this down with an example:
Say we have the following integrations.azure section:
integrations:
  azure:
    - host: dev.azure.com
      credentials:
        - organizations:
            - my-org
            - my-other-org
          clientId: ${AZURE_CLIENT_ID}
          clientSecret: ${AZURE_CLIENT_SECRET}
          tenantId: ${AZURE_TENANT_ID}
        - organizations:
            - another-org
          clientId: ${AZURE_CLIENT_ID}
    - host: server.company.com
      credentials:
        - organizations:
            - yet-another-org
          personalAccessToken: ${PERSONAL_ACCESS_TOKEN}
If the entity we are viewing lives in the my-other-org organization then the dev.azure.com/host-org annotation would look like this:
dev.azure.com/host-org: dev.azure.com/my-other-orgAnd if the entity was from yet-another-org it would look like this:
dev.azure.com/host-org: server.company.com/yet-another-orgNote: To save you time, effort, and confusion setting up these annotations manually you can use the AzureDevOpsAnnotatorProcessor processor which will add the dev.azure.com/host-org and dev.azure.com/project-repo annotations for you with the correct values. The Azure DevOps Annotator Processor backend module for the Catalog plugin has details on how to add this processor.
To get the Azure Pipelines component working you'll need to do the following two steps:
-
First we need to add the
@backstage-community/plugin-azure-devopspackage to your frontend app:# From your Backstage root directory yarn --cwd packages/app add @backstage-community/plugin-azure-devops -
Second we need to add the
EntityAzurePipelinesContentextension to the entity page in your app. How to do this will depend on which annotation you are using in your entities:-
If you are using the
dev.azure.com/project-repoannotation then you'll want to do the following:// In packages/app/src/components/catalog/EntityPage.tsx import { EntityAzurePipelinesContent, isAzureDevOpsAvailable, } from '@backstage-community/plugin-azure-devops'; // For example in the CI/CD section const cicdContent = ( <EntitySwitch> // ... <EntitySwitch.Case if={isAzureDevOpsAvailable}> <EntityAzurePipelinesContent defaultLimit={25} /> </EntitySwitch.Case> // ... </EntitySwitch>
-
If you are using the
dev.azure.com/projectanddev.azure.com/build-definitionannotations then you'll want to do this:// In packages/app/src/components/catalog/EntityPage.tsx import { EntityAzurePipelinesContent, isAzurePipelinesAvailable, } from '@backstage-community/plugin-azure-devops'; // For example in the CI/CD section const cicdContent = ( <EntitySwitch> // ... <EntitySwitch.Case if={isAzurePipelinesAvailable}> <EntityAzurePipelinesContent defaultLimit={25} /> </EntitySwitch.Case> // ... </EntitySwitch>
-
Notes:
- The
ifprop is optional on theEntitySwitch.Case, you can remove it if you always want to see the tab even if the entity being viewed does not have the needed annotation - The
defaultLimitproperty on theEntityAzurePipelinesContentwill set the max number of Builds you would like to see, if not set this will default to 10
To get the Azure Repos component working you'll need to do the following two steps:
-
First we need to add the @backstage-community/plugin-azure-devops package to your frontend app:
# From your Backstage root directory yarn --cwd packages/app add @backstage-community/plugin-azure-devops -
Second we need to add the
EntityAzurePullRequestsContentextension to the entity page in your app:// In packages/app/src/components/catalog/EntityPage.tsx import { EntityAzurePullRequestsContent, isAzureDevOpsAvailable, } from '@backstage-community/plugin-azure-devops'; // For example in the Service section const serviceEntityPage = ( <EntityLayout> // ... <EntityLayout.Route if={isAzureDevOpsAvailable} path="/pull-requests" title="Pull Requests"> <EntityAzurePullRequestsContent defaultLimit={25} /> </EntityLayout.Route> // ... </EntityLayout>
Notes:
- You'll need to add the
EntityLayout.Routeabove from step 2 to all the entity sections you want to see Pull Requests in. For example if you wanted to see Pull Requests when looking at Website entities then you would need to add this to thewebsiteEntityPagesection. - The
ifprop is optional on theEntityLayout.Route, you can remove it if you always want to see the tab even if the entity being viewed does not have the needed annotation - The
defaultLimitproperty on theEntityAzurePullRequestsContentwill set the max number of Pull Requests you would like to see, if not set this will default to 10
To get the Git Tags component working you'll need to do the following two steps:
-
First we need to add the @backstage-community/plugin-azure-devops package to your frontend app:
# From your Backstage root directory yarn --cwd packages/app add @backstage-community/plugin-azure-devops -
Second we need to add the
EntityAzureGitTagsContentextension to the entity page in your app:// In packages/app/src/components/catalog/EntityPage.tsx import { EntityAzureGitTagsContent, isAzureDevOpsAvailable, } from '@backstage-community/plugin-azure-devops'; // For example in the Service section const serviceEntityPage = ( <EntityLayout> // ... <EntityLayout.Route if={isAzureDevOpsAvailable} path="/git-tags" title="Git Tags"> <EntityAzureGitTagsContent /> </EntityLayout.Route> // ... </EntityLayout>
Notes:
- You'll need to add the
EntityLayout.Routeabove from step 2 to all the entity sections you want to see Git Tags in. For example if you wanted to see Git Tags when looking at Website entities then you would need to add this to thewebsiteEntityPagesection. - The
ifprop is optional on theEntityLayout.Route, you can remove it if you always want to see the tab even if the entity being viewed does not have the needed annotation
To get the README component working you'll need to do the following two steps:
-
First we need to add the @backstage-community/plugin-azure-devops package to your frontend app:
# From your Backstage root directory yarn --cwd packages/app add @backstage-community/plugin-azure-devops -
Second we need to add the
EntityAzureReadmeCardextension to the entity page in your app:// In packages/app/src/components/catalog/EntityPage.tsx import { EntityAzureReadmeCard, isAzureDevOpsAvailable, } from '@backstage-community/plugin-azure-devops'; // As it is a card, you can customize it the way you prefer // For example in the Service section const overviewContent = ( <Grid container spacing={3} alignItems="stretch"> <EntitySwitch> <EntitySwitch.Case if={isAzureDevOpsAvailable}> <Grid item md={6}> ... </Grid> <Grid item md={6}> <EntityAzureReadmeCard maxHeight={350} /> </Grid> </EntitySwitch.Case> </EntitySwitch> </Grid> );
Notes:
- You'll need to add the
EntitySwitch.Caseabove from step 2 to all the entity sections you want to see Readme in. For example if you wanted to see Readme when looking at Website entities then you would need to add this to thewebsiteEntityPagesection. - The
ifprop is optional on theEntitySwitch.Case, you can remove it if you always want to see the tab even if the entity being viewed does not have the needed annotation - The
maxHeightproperty on theEntityAzureReadmeCardwill set the maximum screen size you would like to see, if not set it will default to 100%
Azure DevOps plugin supports the permission framework for PRs, GitTags, Pipelines and Readme features.
# From your Backstage root directory
yarn --cwd packages/backend add @backstage-community/plugin-azure-devops-common
New Backend you can skip the below and proceed with permission configuration
To enable permissions for the legacy backend system in packages/backend/src/plugins/azure-devops.ts add the following.
export default async function createPlugin(
  env: PluginEnvironment,
): Promise<Router> {
  return createRouter({
    logger: env.logger,
    config: env.config,
    reader: env.reader,
+   permissions: env.permissions,
  });
}To apply the permission rules add the following in packages/backend/src/plugins/permissions.ts.
Note: the following is just an example of how you might want to setup permissions, as an Adopter you can configure this to fit your needs. Also all the permissions are Resource Permissions as they work with an Entity with the exception of
azureDevOpsPullRequestDashboardReadPermission.
+ import {
+  azureDevOpsPullRequestReadPermission,
+  azureDevOpsPipelineReadPermission,
+  azureDevOpsGitTagReadPermission,
+  azureDevOpsReadmeReadPermission,
+  azureDevOpsPullRequestDashboardReadPermission } from '@backstage-community/plugin-azure-devops-common';
+ import {
+  AuthorizeResult,
+  PolicyDecision,
+  isPermission,
+ } from '@backstage/plugin-permission-common';
+ import {
+   catalogConditions,
+   createCatalogConditionalDecision,
+ } from '@backstage/plugin-catalog-backend/alpha';
...
async handle(
  request: PolicyQuery,
  user?: BackstageIdentityResponse,
): Promise<PolicyDecision> {
+ if ( isPermission(request.permission, azureDevOpsPullRequestReadPermission) ||
+      isPermission(request.permission, azureDevOpsPipelineReadPermission) ||
+      isPermission(request.permission, azureDevOpsGitTagReadPermission) ||
+      isPermission(request.permission, azureDevOpsReadmeReadPermission)) {
+    return createCatalogConditionalDecision(
+      request.permission,
+      catalogConditions.isEntityOwner({
+          claims: user?.identity.ownershipEntityRefs ?? [],
+       }),
+    );
+  }

+ if ( isPermission(request.permission, azureDevOpsPullRequestDashboardReadPermission) {
+ return {
+   result: AuthorizeResult.ALLOW,
+  };
+ }

  return {
    result: AuthorizeResult.ALLOW,
  };
}


