Welcome to boilerplate-lib-vite-react 👋
Boilerplate to create library with Vite, Typescript and React.js
✒️ Author
- Github: @panhavsilva
Install dependencies
yarnRun the dev server
yarn dev

#dev server running at: http://localhost:3000/
Scripts
| Script | Description |
|---|---|
yarn dev |
Run dev server |
yarn build |
Generates production build |
yarn lint |
Run linter |
yarn lint:fix |
Fix lint errors |
yarn type-check |
TS type checking |
yarn ci |
Run lint, type checking and tests (meant to be used in a CI) |
yarn prepare |
Not supposed to be manually used. It's just to configure husky |
🚀 Usage
Creating your token for publish in to NPM
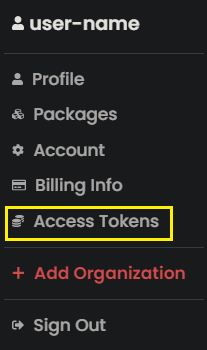
- In the upper right corner of the page, click your profile picture, then click "Access Tokens".
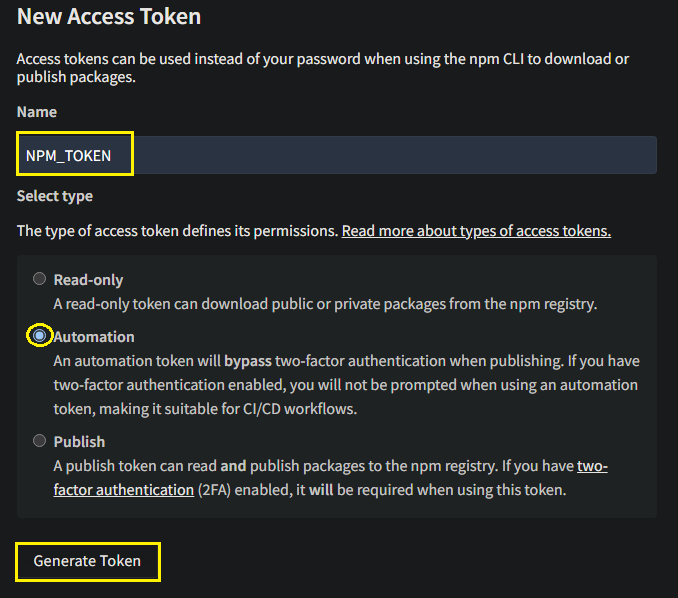
3. Name your token "NPM_TOKEN".
4. Select the type of access token "Automation".
5. Click "Generate Token".
6. Copy the token from the top of page to include in Github secrets.
Configuring your secrets on Github
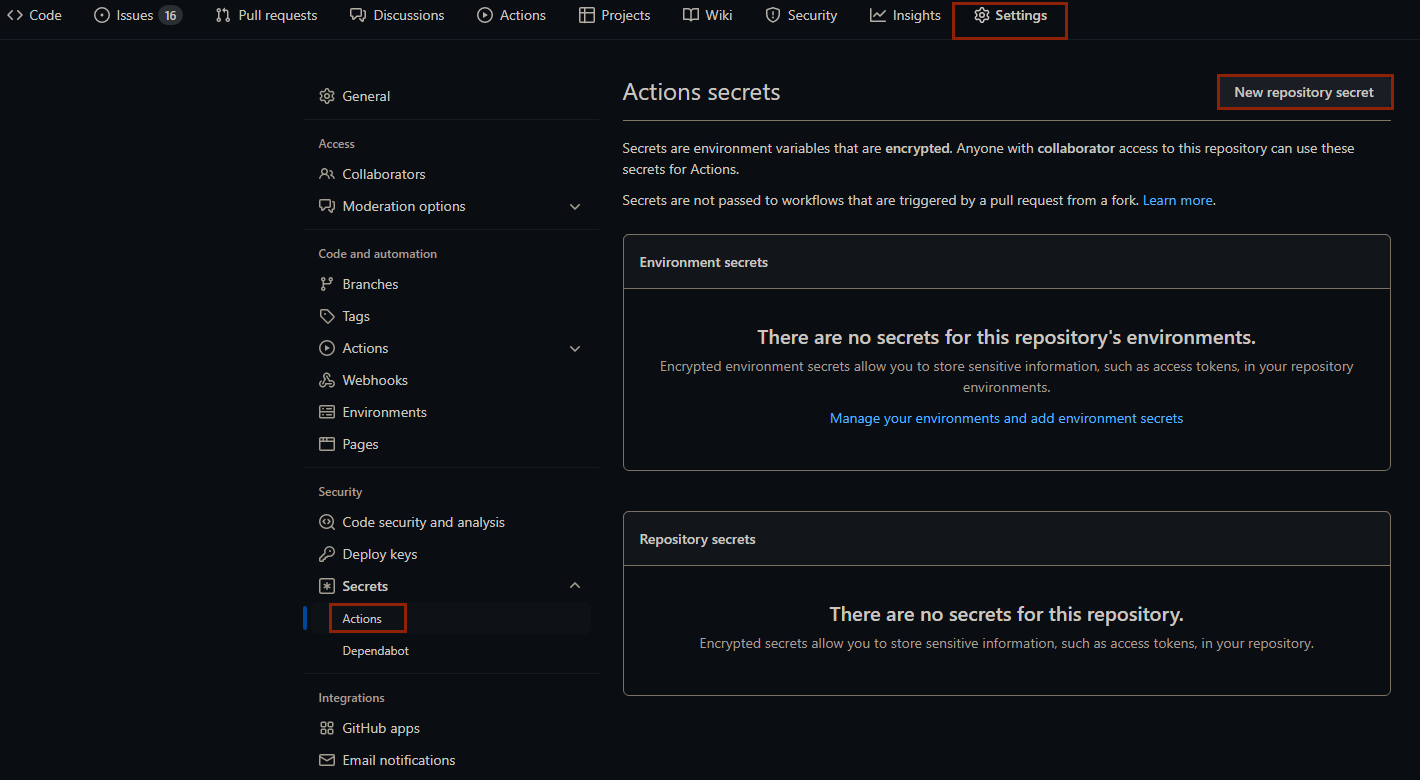
- On GitHub, navigate to the main page of the repository.
- Under your repository name, click on the "Settings" tab.
- In the left sidebar, click "Secrets" after click "Actions".
- Click on button "New repositury secret" on the right.
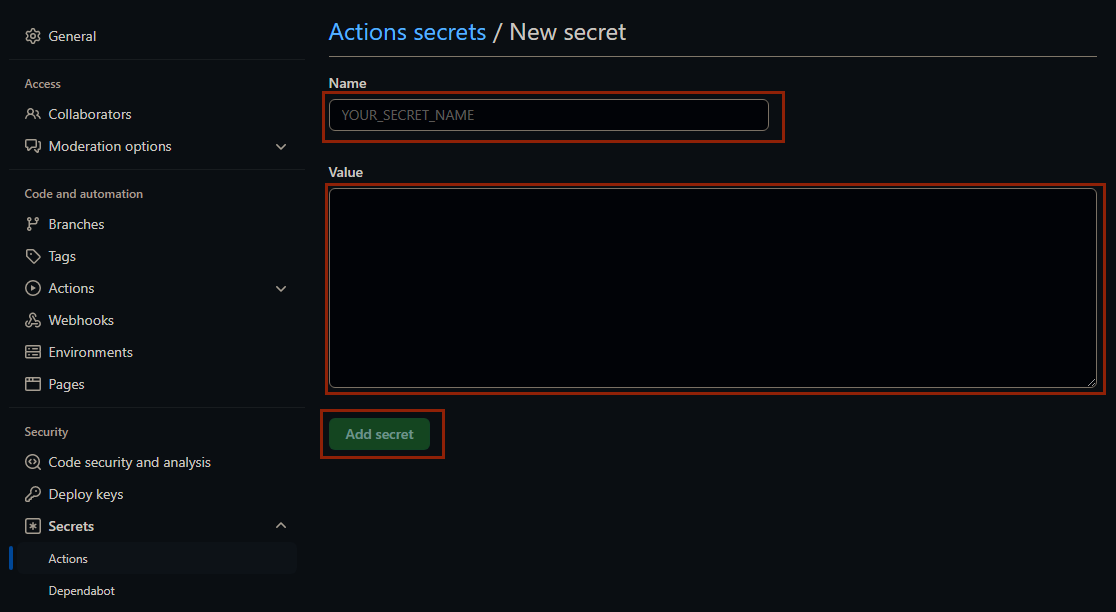
- Type NPM_TOKEN in the "Name" input box.
- Type the value for your secret.
- Click "Add secret".
Generate tag version on Github
- On GitHub, navigate to the main page of the repository.
- Under your repository name, click on the "Actions" tab.
- In the left sidebar, click "Generate tag version".
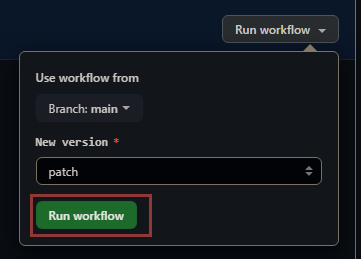
- Click on button "Run workflow".
- Select branch to use generate tag version workflow and select version (patch, minor or major).
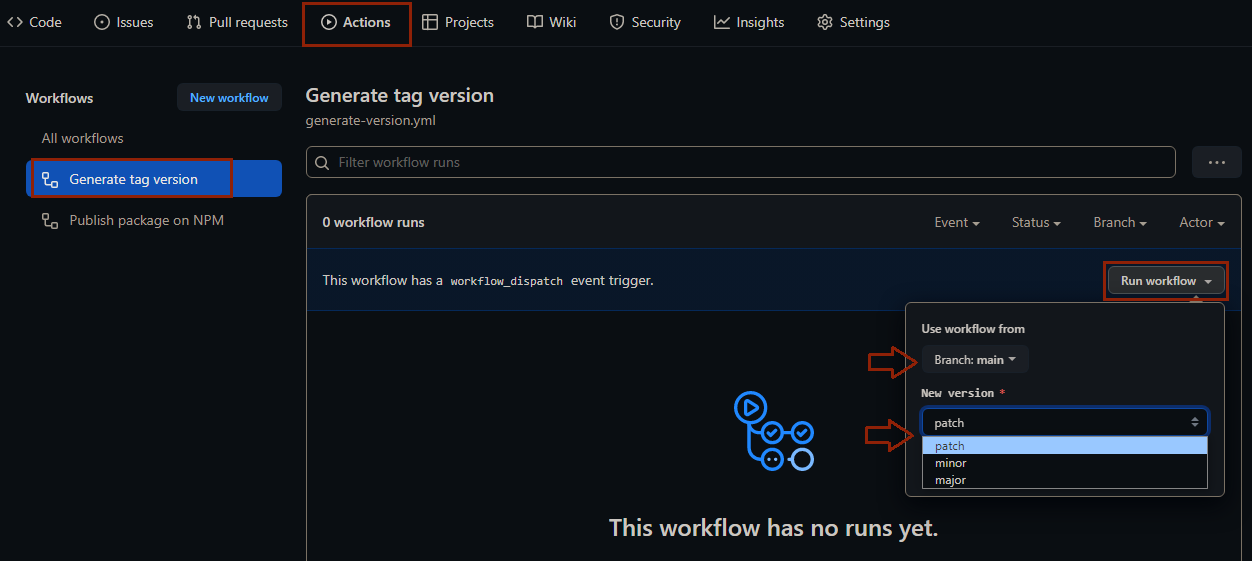
- Click on button "Run workflow".
Create Releases
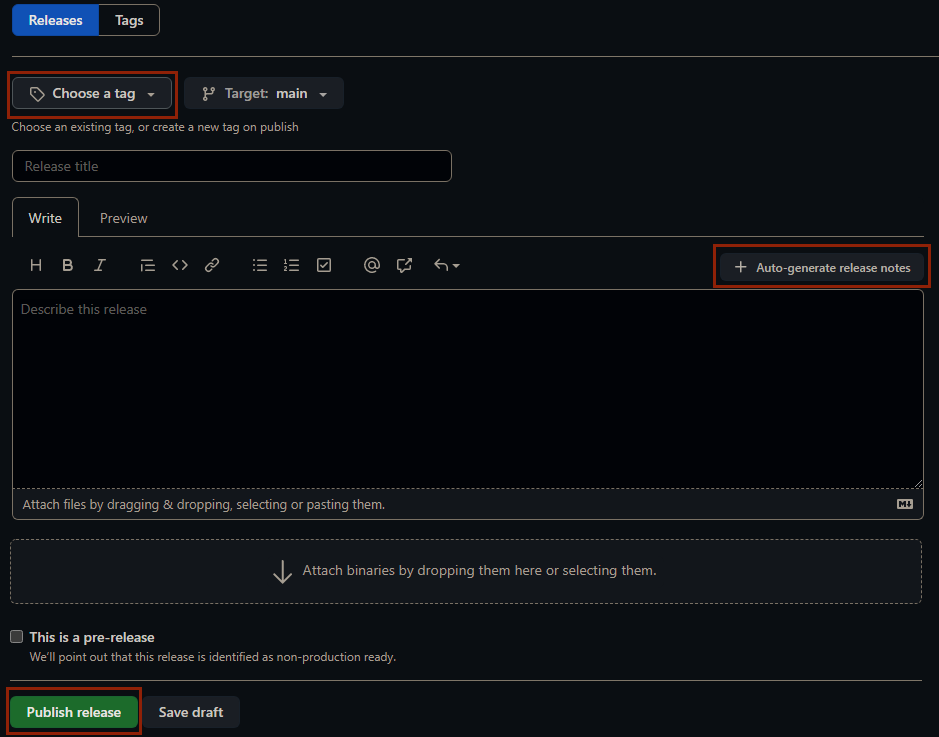
- On GitHub, navigate to the main page of the repository.
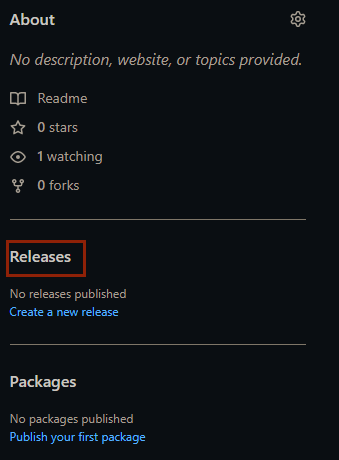
- To the right of the list of files, click "Releases".
5. Click "Auto-generate release notes".
6. Click on button "Publish release".
Change in your project
- In to folder lib:
- Change main.tsx to name of your lib.tsx
- Include code of your lib here.
- In to package.json:
{ "name": "", //@+"your username NPM"/"name of your lib" without quotes and plus signal "description": "", //description of your lib "main": "./dist/name of your lib.umd.js", //put the name of your lib.umd.js "module": "./dist/name of your lib.es.js", //put the name of your lib.es.js "types": "./dist/lib/main.d.ts", // put the name of your lib.d.ts "exports": { ".": { "import": "./dist/name of your lib.es.js", // put the name of your lib.es.js "require": "./dist/name of your lib.umd.js" // put the name of your lib.umd.js } }, "repository": { "type": "git", "url": "" //url of repository of your lib on Github }, "keywords": [], //include keywords searched in NPM relative to your lib "author": "", //your name "bugs": { "url": "https://github.com/your username/your repository/issues" //url of repository of your lib on Github/issues }, "homepage": "https://github.com/your username/your repository#readme" //url of repository of your lib on Github#readme } - In to tsconfig.node.json:
{ "paths": { "@username NPM/name of your lib": [ "./lib/name of your lib.tsx" ] } //put @ + your username NPM/name of your lib: put the name of your lib } - In to vite.config.ts:
  build: {
    lib: {
      entry: resolve('lib', 'main.tsx'),
      name: 'ReactFeatureFlag',
      fileName: (format) => `name of your lib.${format}.js`, //put the name of your lib
    },
    rollupOptions: {
      external: ['react'],
    },
  },
- In to src/ app.tsx
- Import your lib from ./lib.
- Include your lib in the return function app.
- Assets folder can be deleted
- Change README.md
🤝 Contributing
Contributions, issues and feature requests are welcome!
Feel free to check issues page. You can also take a look at the contributing guide.
✨ Show your support
Give a
📝 License
Copyright © current Pâmela Vieira da Silva - @panhavsilva.
This project is MIT licensed.


