react-annotate
Play with the demo
Install
npm install @zityspace/react-annotateGet started
Simple example to annotate bounding boxes:
import { Annotator, ImageData } from '@zityspace/react-annotate';

const Example = () => {
  // fake a batch (or one page) of annotations fetched from an api or a local file
  const imagesListRaw = [
    {
      name: '000000261061.jpg',
      height: 334,
      width: 500,
      url: 'http://images.cocodataset.org/val2017/000000261061.jpg',
      annotations: [
        {
          category: 'person',
          x: 260.16,
          y: 41.7,
          w: 111.51,
          h: 292.3,
        },
        {
          category: 'baseball bat',
          x: 132.41,
          y: 229.89,
          w: 112.82,
          h: 9.4,
        },
        {
          category: 'potted plant',
          x: 164.96,
          y: 98.06,
          w: 39.82,
          h: 54.85,
        },
      ],
    },
    // more images with annotations as above
  ];

  const imagesList: ImageData[] = imagesListRaw.map((image) => ({
    ...image,
    annotations: image.annotations.map((box) => ({ ...box, type: 'box' })),
  }));

  return (
    <Annotator
      imagesList={imagesList}
      initIndex={0}
      onSave={async (image: ImageData) => {
        console.log(image);
        return true;
      }}
      onError={(msg: string, context: any) => {
        console.log(msg, context);
      }}
      onAddCategory={async (category: string) => {
        console.log('add new category ', category);
        return true;
      }}
      onRenameCategory={async (
        oldName: string,
        newName: string,
        timestamp?: string
      ) => {
        console.log(oldName, ' -> ', newName, ' @ ', timestamp);
        return true;
      }}
    />
  );
};
The classes you will use are Annotator, ImageData.
Typically, the whole process is first fetch a batch of annotations with image meta information and annotations on each image, then transform the annotations on each image into interested labels, and lastly feed them into the Annotator, there you get a nice UI for annotation. The complete props for Annotator are:
{
  imagesList: ImageData[];
  initIndex?: number;
  categories?: string[];
  getImage?: (imageName: string) => Promise<string> | string;
  onSave: (curImageData: ImageData) => Promise<boolean> | boolean;
  onError?: (message: string, context?: any) => void;
  onAddCategory: (category: string) => Promise<boolean> | boolean;
  onRenameCategory: (
    oldCategory: string,
    newCategory: string,
    timestamp?: string
  ) => Promise<boolean> | boolean;
  labelConfigs?: LabelConfigs;
}
You can either specify url for each image, or pass in a getImage() function, which uses the image name to request the image blob and then return URL.createObjectURL(imageBlob). It is also recommended to pass in categorie of the whole dataset to Annotator. Otherwise it will be infered from imagesList, which is only one batch of annotations thus the infered categories is not complete.
Import: react-annotate is only an annotation ui component, it does not contain the logic to persist the changes of annotations. Therefore you need to implement onSave(), onAddCategory() and onRenameCategory(), typically api calls to your backend, to persist the changes. Otherwise, after loading a new batch of annotations, the changes on previous batch will be lost. Switching to the prev/next image and if current image annotation has been changed, it will trigger onSave(); when adding a new category or renaming a category, it will trigger onAddCategory() and onRenameCategory(). The optional onError() handles the failure of loading an image.
Other related types/interfaces are:
interface ImageData {
  name: string;
  width?: number;
  height?: number;
  annotations: Annotations;
  url?: string;
  [k: string]: unknown;
}

type Annotations = ((
  | {
      type: 'point';
      x: number;
      y: number;
    }
  | {
      type: 'line';
      x1: number;
      y1: number;
      x2: number;
      y2: number;
    }
  | {
      type: 'box';
      x: number;
      y: number;
      w: number;
      h: number;
    }
  | {
      type: 'polyline';

      // Why it is 2D paths instead of 1D path?
      // We want to support advanced editing that one Polyline can be break into
      // multiple sub-polylines as intermediate state and in the end get connected
      // and merged back as a single polyline
      paths: { x: number; y: number }[][];
    }
  | {
      type: 'mask';

      // The simplest mask can be seemed as one closed path. A mask with holes can be
      // seemed as multiple paths with some of them hole = true. Like PolylineLabel, a
      // mask (or closed path) can also be break into multiple open paths as intermediate
      // state and in the end get connected and merged back as closed paths.
      paths: {
        points: { x: number; y: number }[];
        closed?: boolean;
        hole?: boolean;
      }[];
    }
  | {
      type: 'keypoints';
      keypoints: { x: number; y: number; vis: boolean; sid: number }[];
    }
) & {
  category: string;
  timestamp?: string;
  hash?: string;
})[];

interface LabelConfigs {
  keypoints?: { structure: [number, number][] };
}
Concepts
Major concepts are: Label, RenderMode, ListenerGroup, StateStack. Currently this library supports 5 label types: PointLabel, LineLabel, BoxLabel, PolylineLabel, MaskLabel.
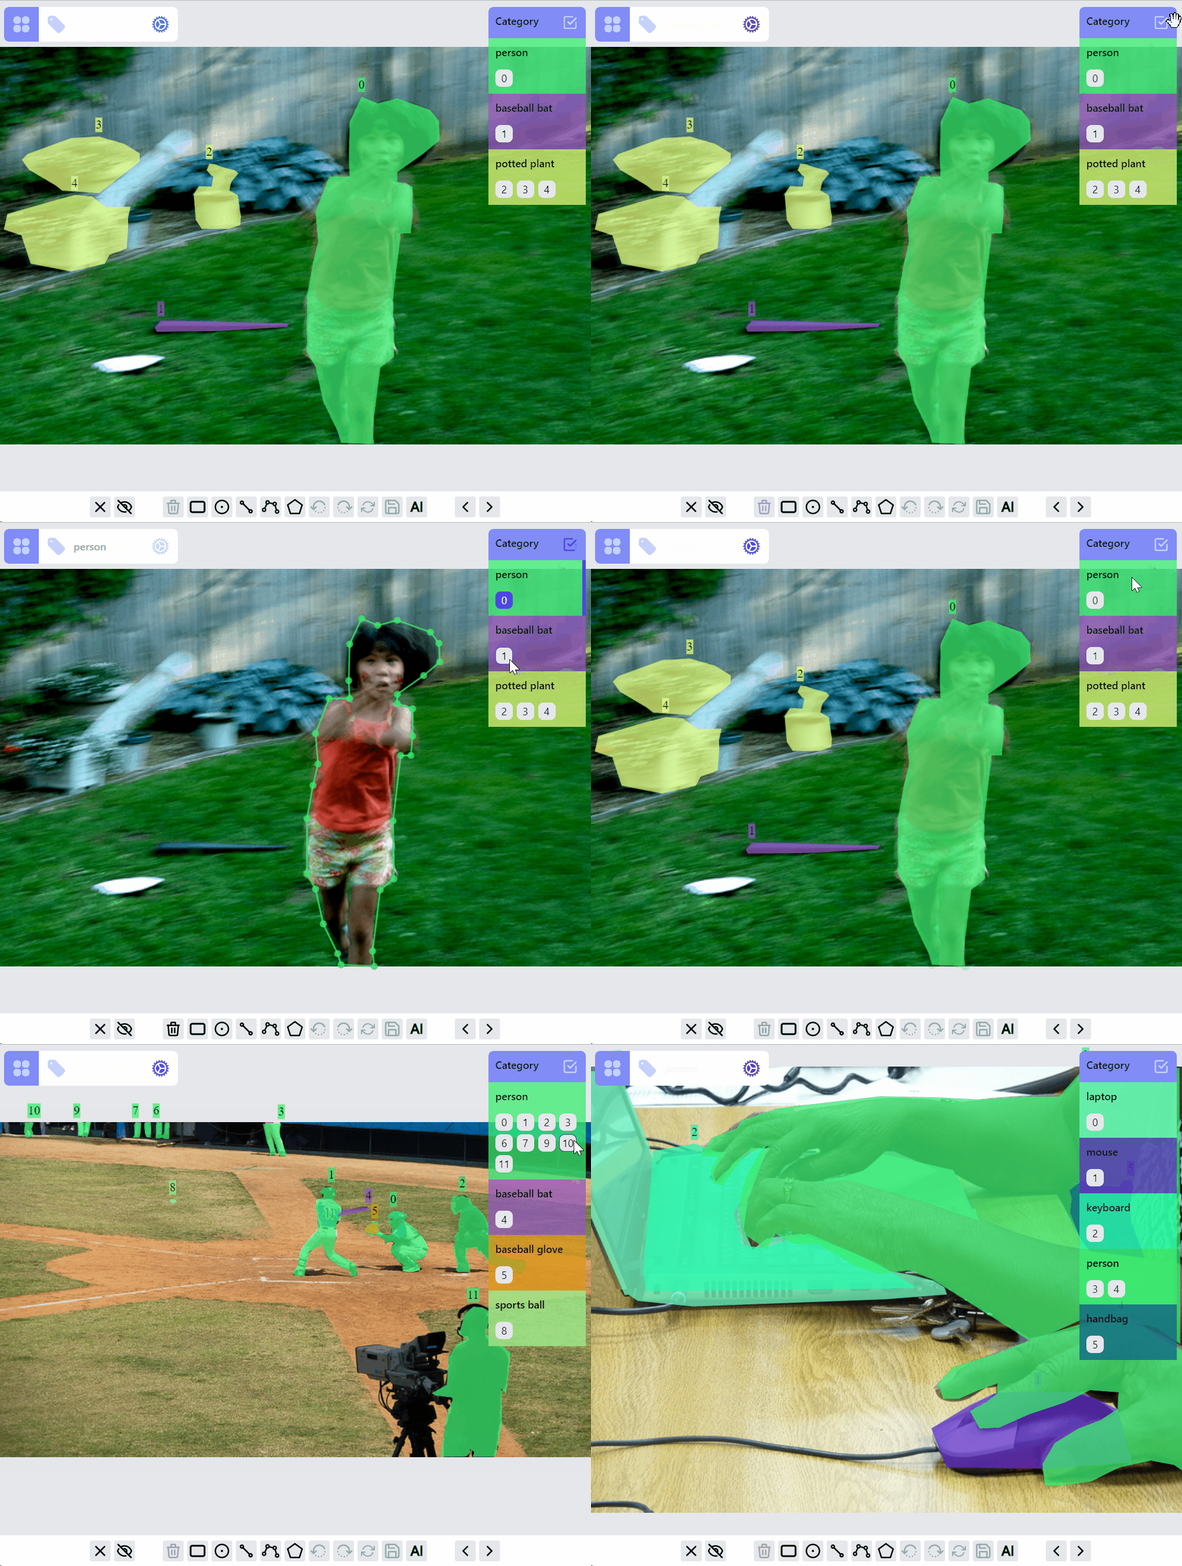
For each label, it can be in different RenderMode: hidden, preview, drawing, selected. All labels of an image are initially rendered with preview mode. When adding/drawing a new label, all existed labels are in hidden mode, and the label on drawing is in drawing mode. Labels can be selected/filtered by clicking on the canvas objects, or clicking on the category and ids. Nonselected labels will be in hidden mode, while selected labels will be in selected mode, or preview mode depending on how many labels are selected.
A ListenerGroup is a set of event listeners that will get registered on the canvas, it dictates what interactions you can have with the canvas and labels. As an example, when adding/drawing a new BoxLabel, then box:draw listener group will be registered for the canvas, when editing a LineLabel, then line:edit listener group will be registered, when mouse is not over any label, then the canvas transists to default listener group. Each label type typically has :draw and :edit listener groups, for some label types that involve more complicated interactions, you may need to implement extra listener groups such as :draw:advanced for PolylineLabel and MaskLabel.
This demo shows the current ListenerGroup and each label's RenderMode.
Such design gives great flexibility to extend to new label types. Basically with the following decided, you can create a new label type: 1. what data props/keys are needed to construct the new label type, 2. how to render the label at each RenderMode, 3. what's the interaction when drawing/editing this label. However, in your implementation of listener groups for a new label type, you have to be careful to take care of transitions between different listener groups.
StateStack stores the history of all labels' states for an image, so you can redo/undo changes. Switching to a new image will reset the stack.
How to annotate
Selections / filters
Select/filter one or multiple labels: click on the label, or a category, or ids. The selected category is persisted so when switching to other images, only labels of selected category are in preview or selected mode.
Category ops
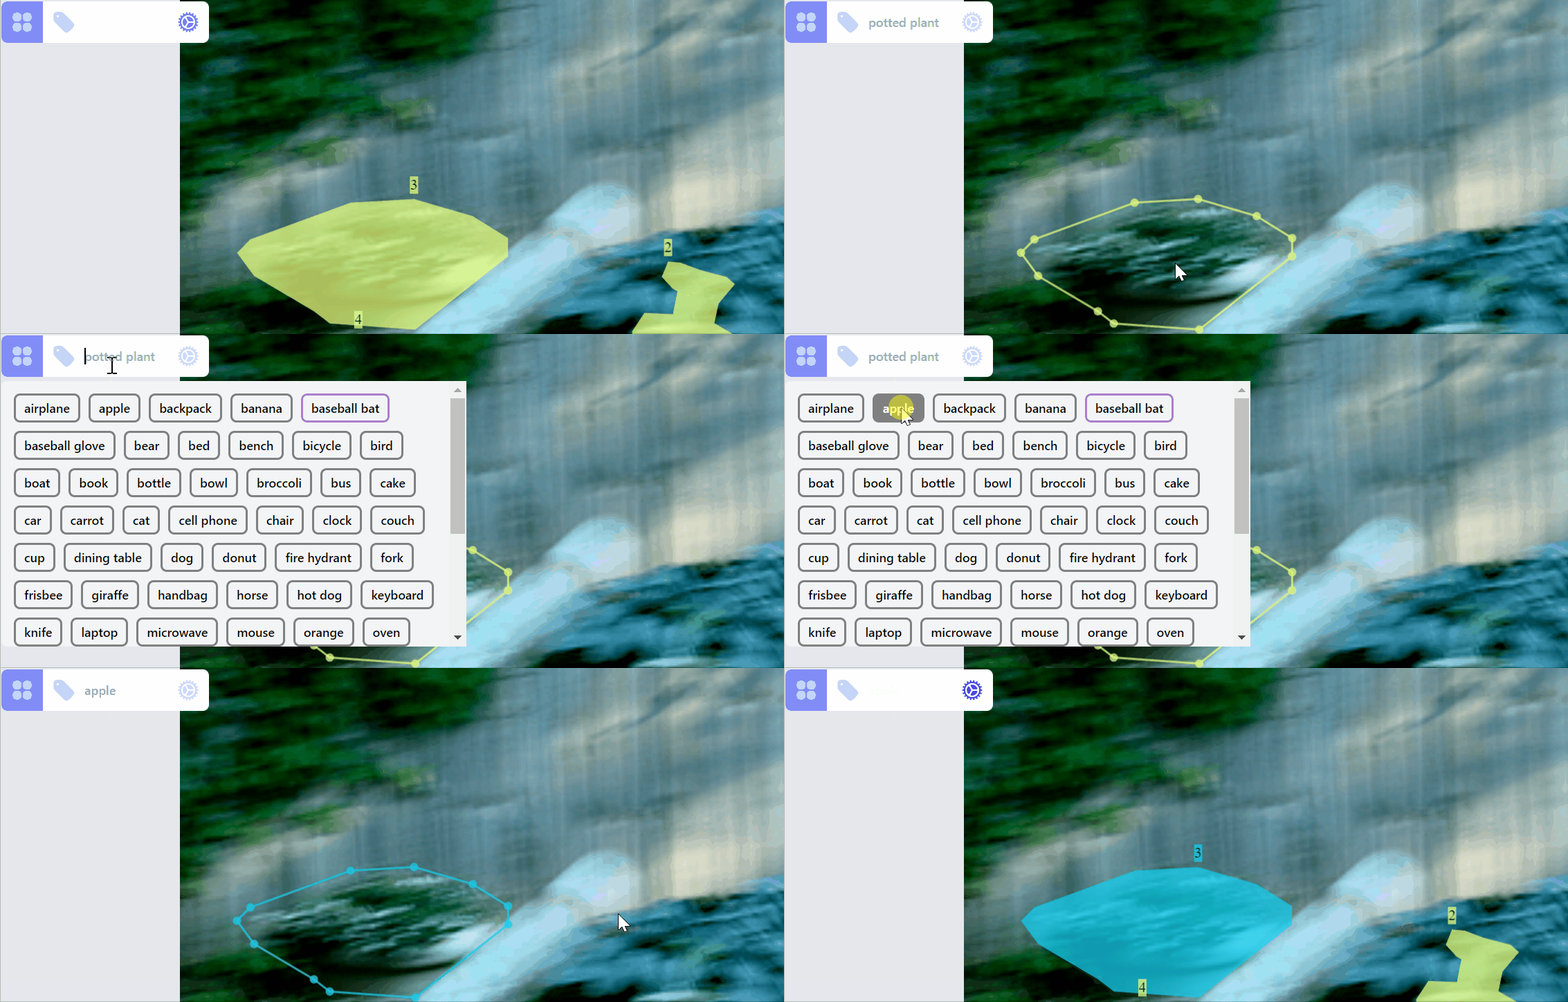
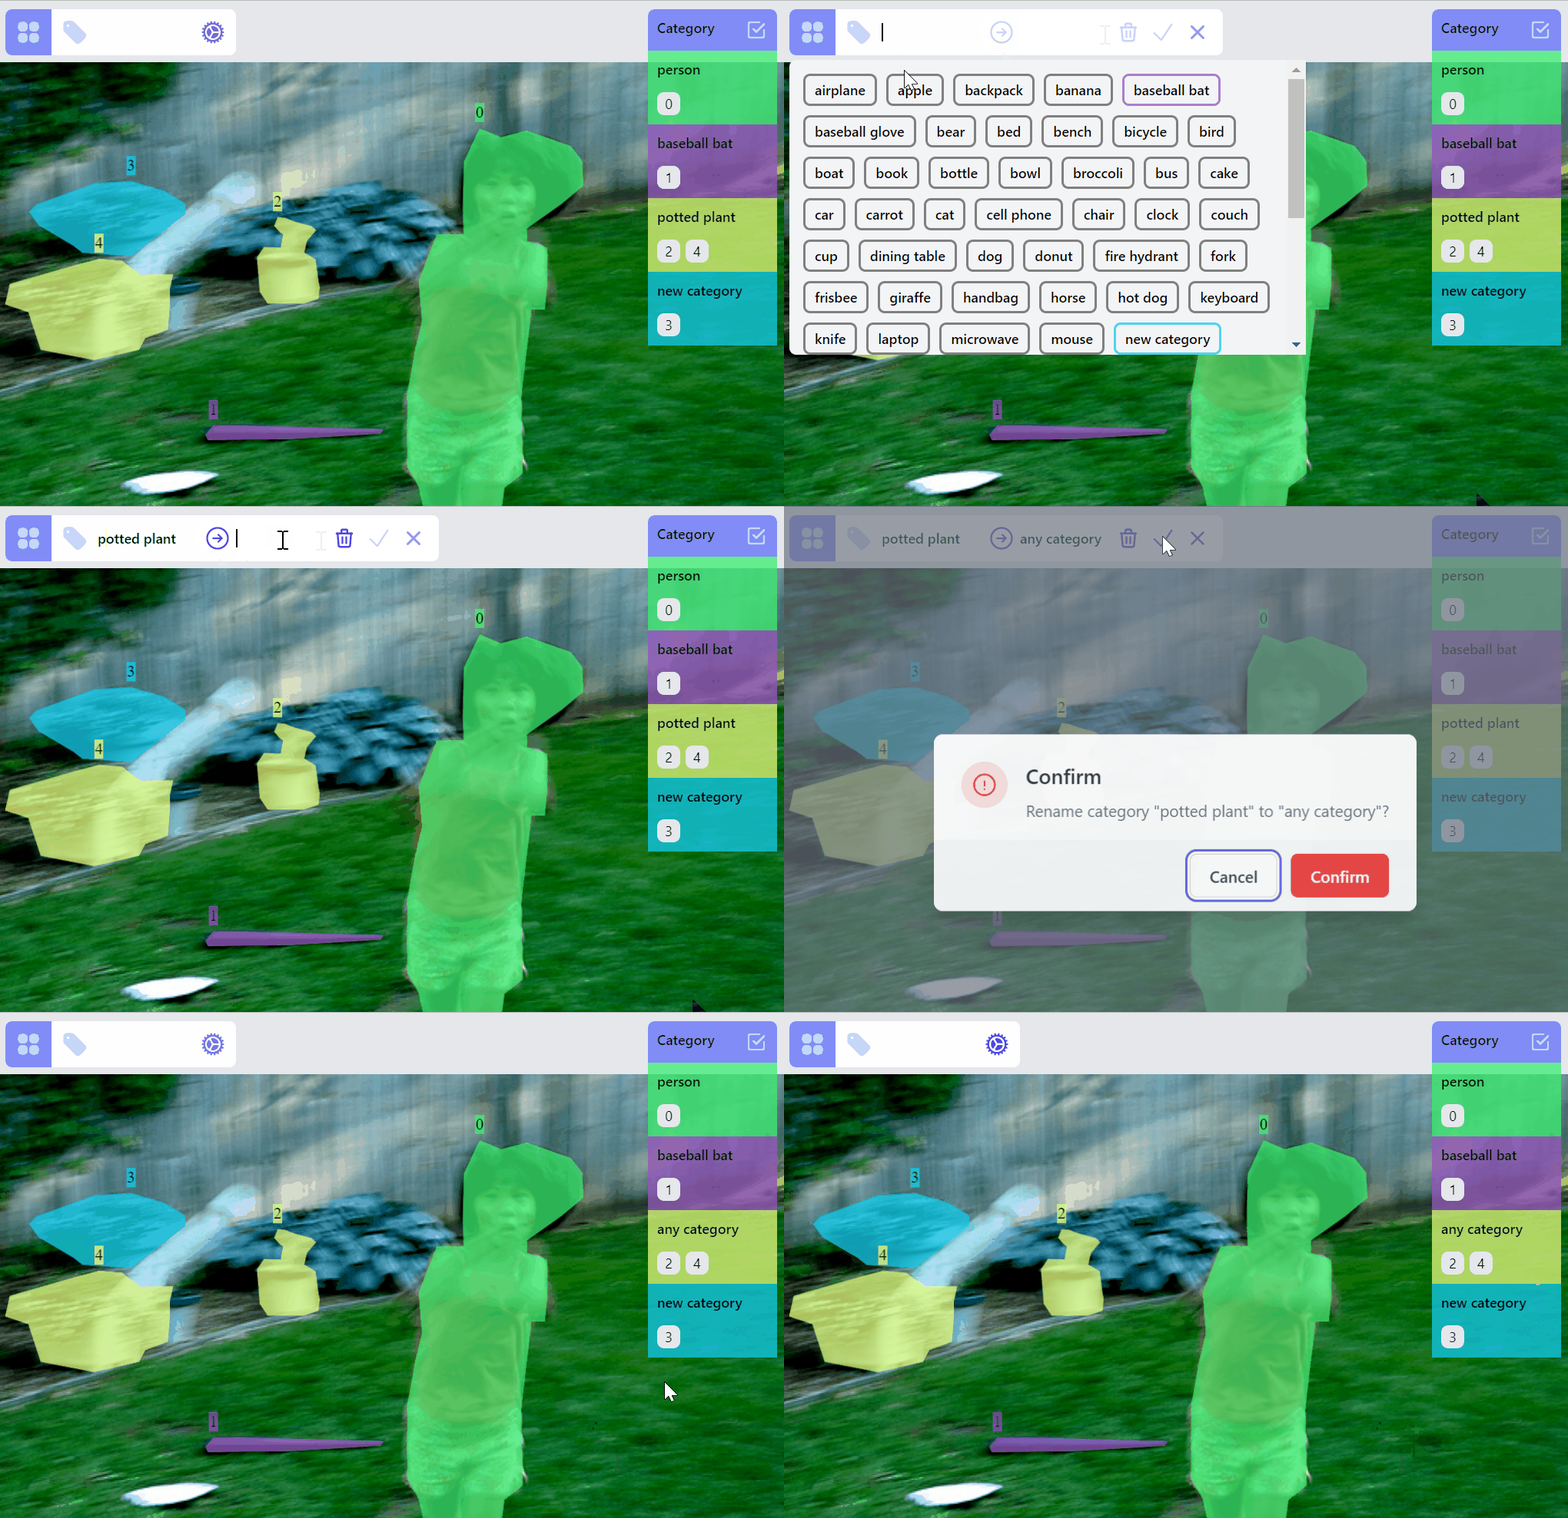
Update category of a label:
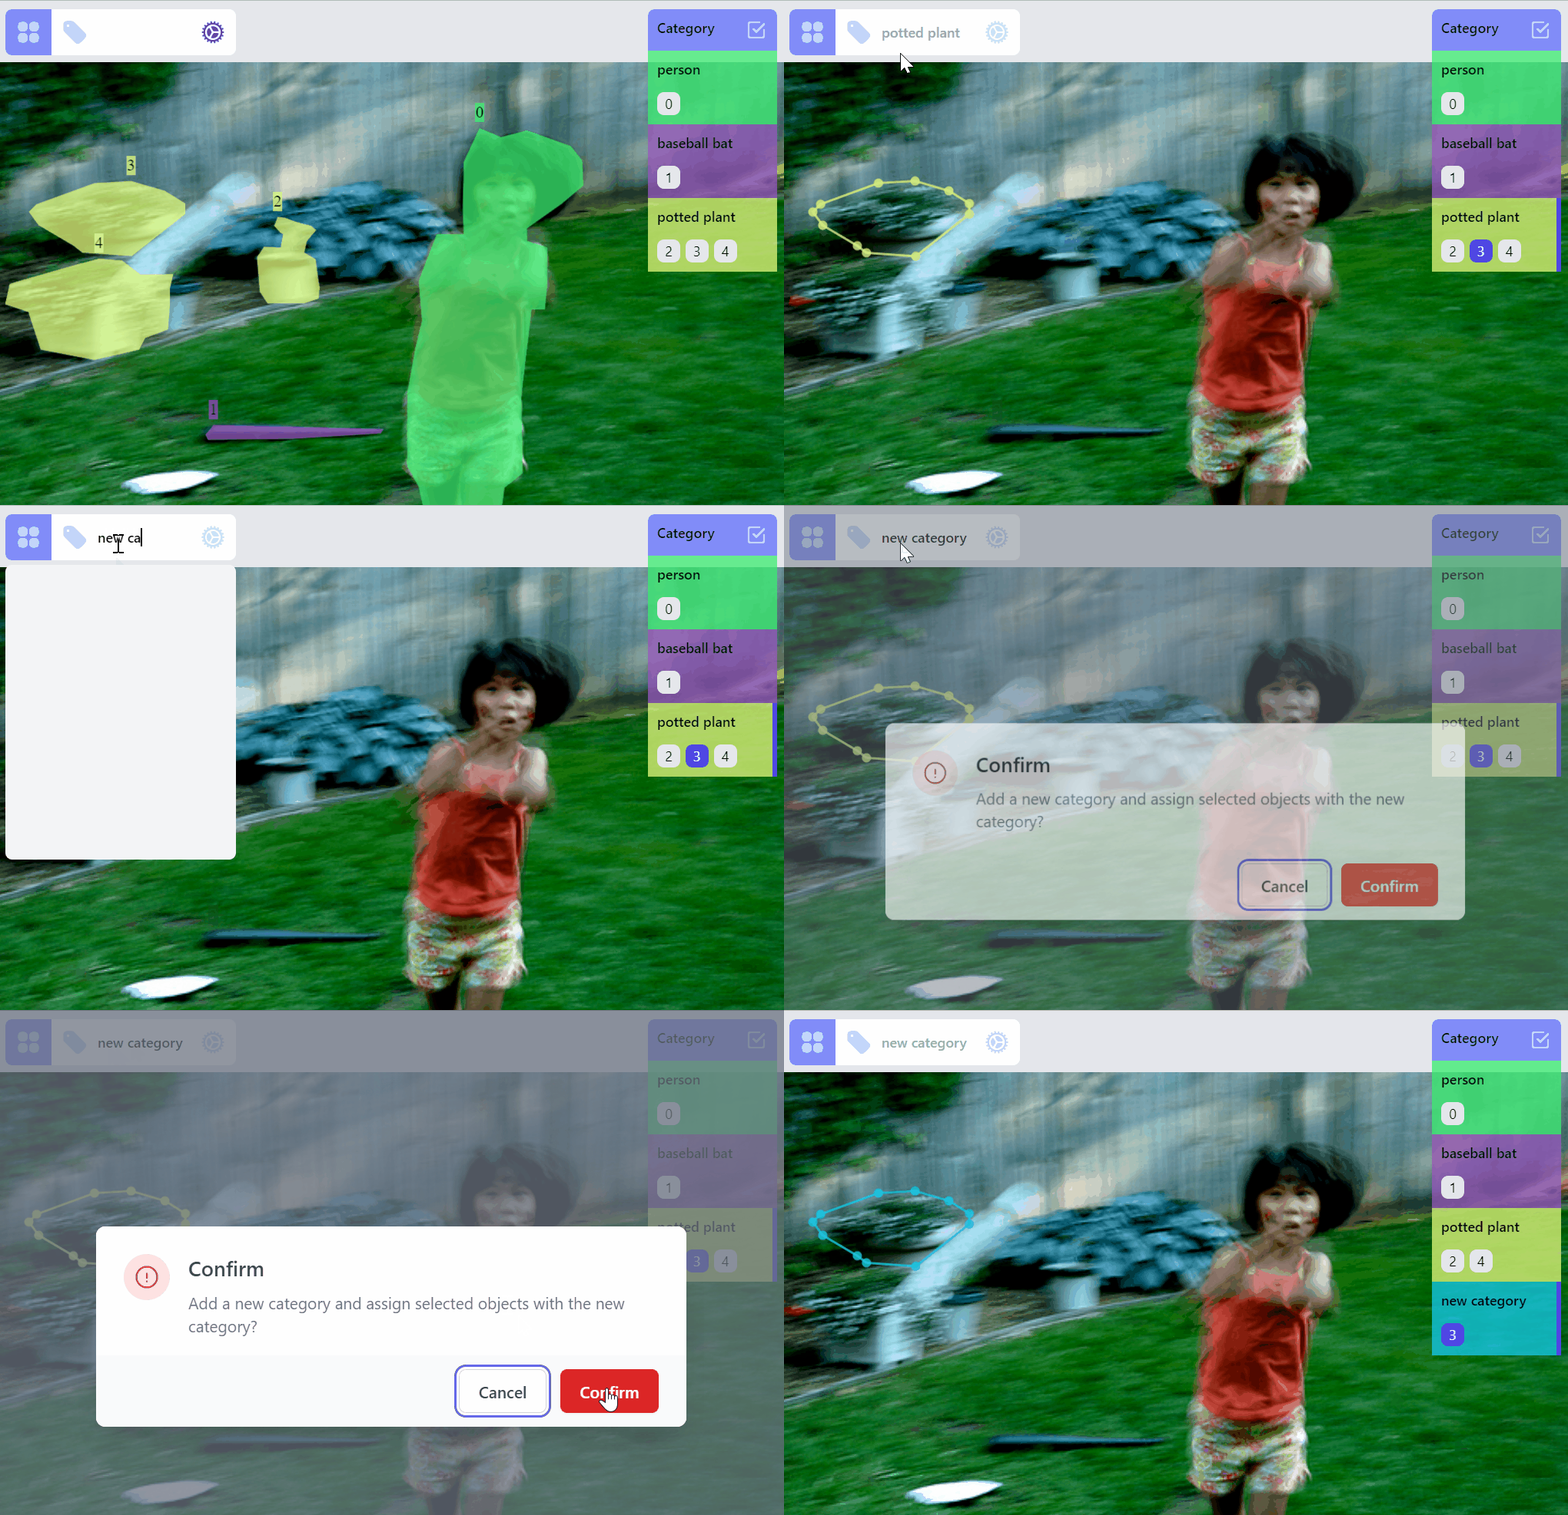
Create a new category for selected label:
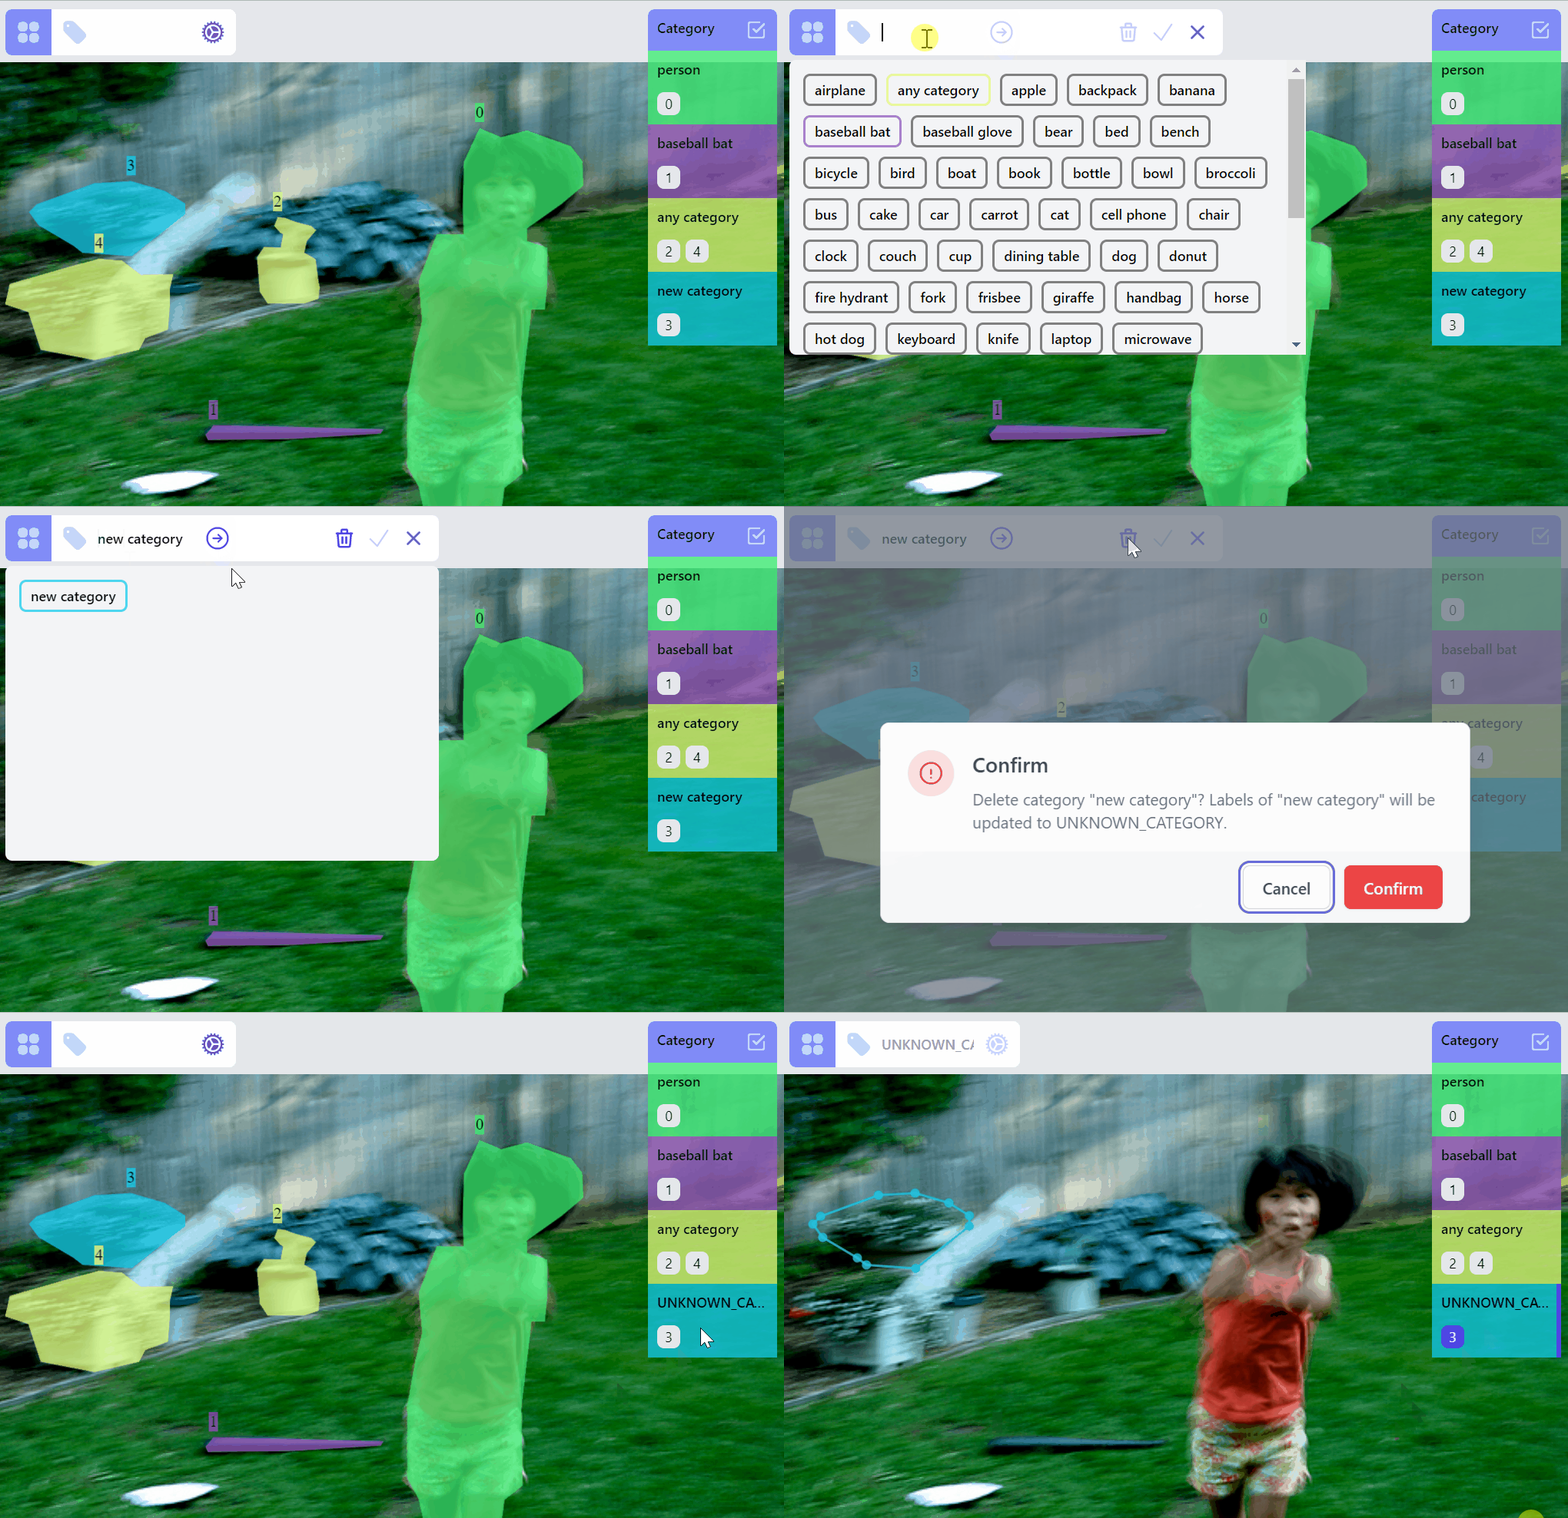
Delete a category:
Rename a category:
Label ops
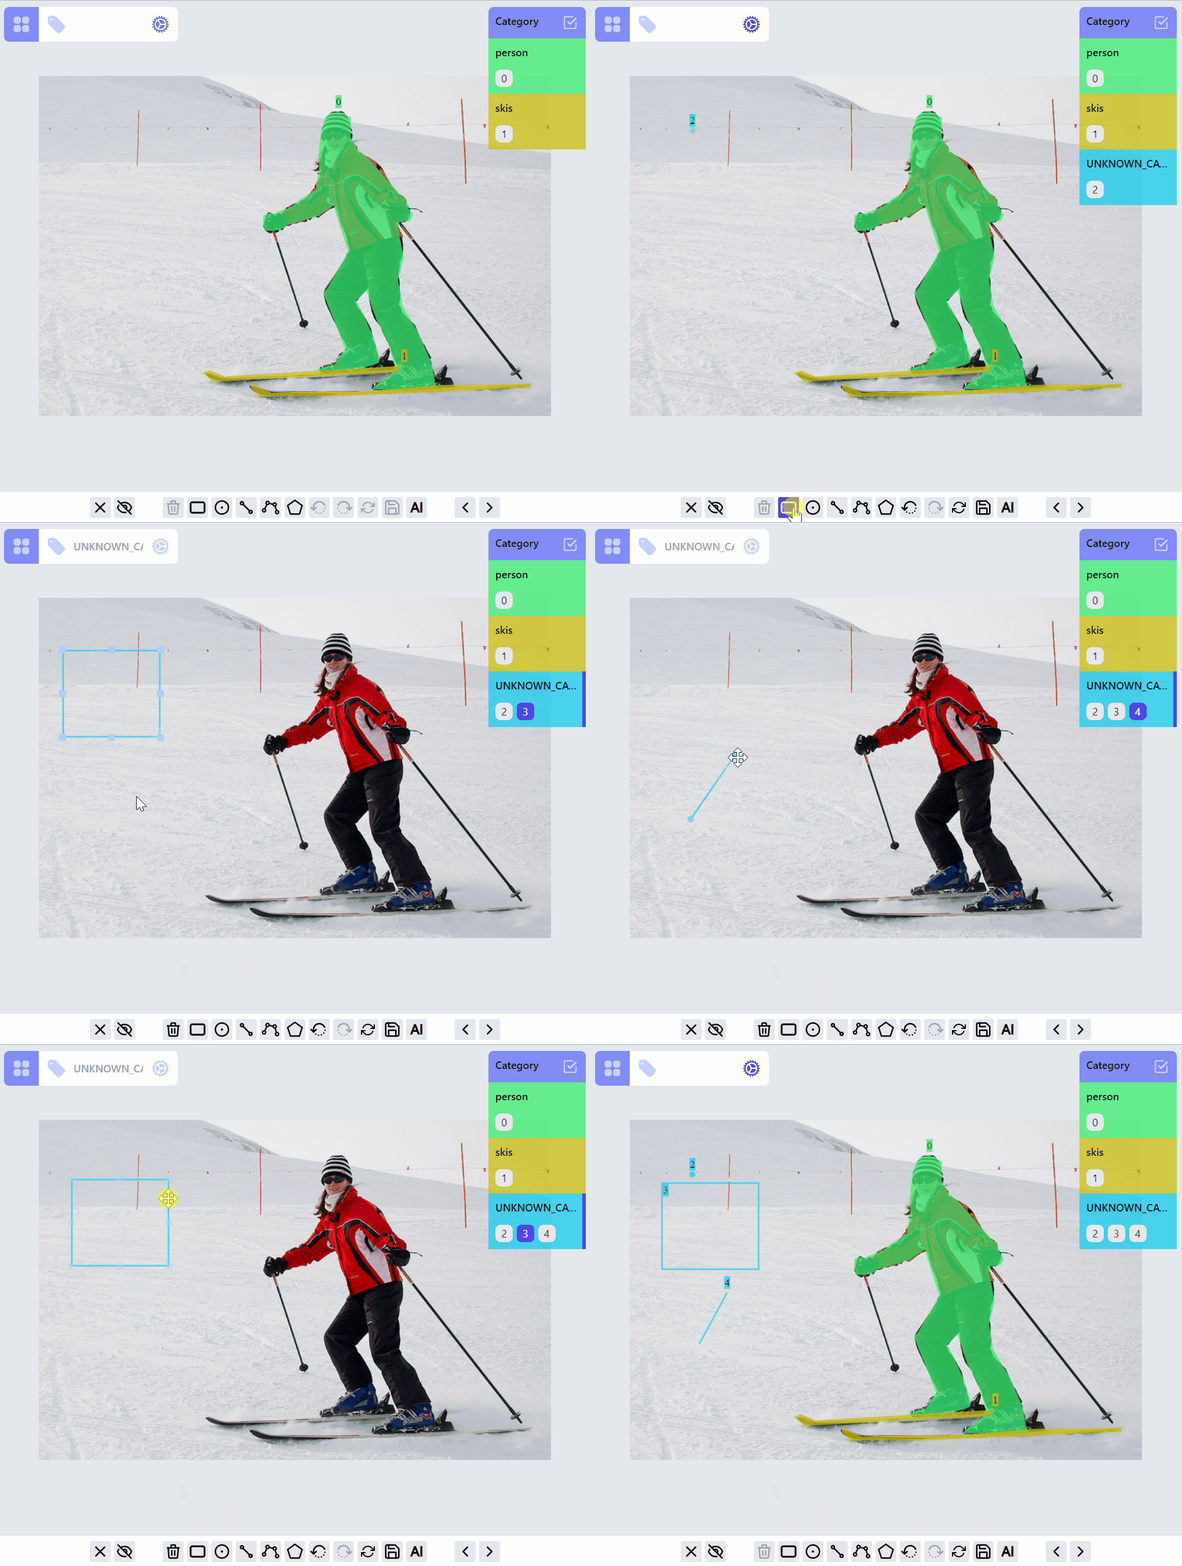
Operations on PointLabel, LineLabel, BoxLabel are straightforward:
Operations on PolylineLabel and MaskLabel are more complicated, both of them supporting "AI mode", Currently AI mode is just using opencv's intelligentScissor to find lines, it maybe helpful for PolylineLabel but not so much for MaskLabel, we will soon integrate/enable related AI predictions into the annotation process based on label types.
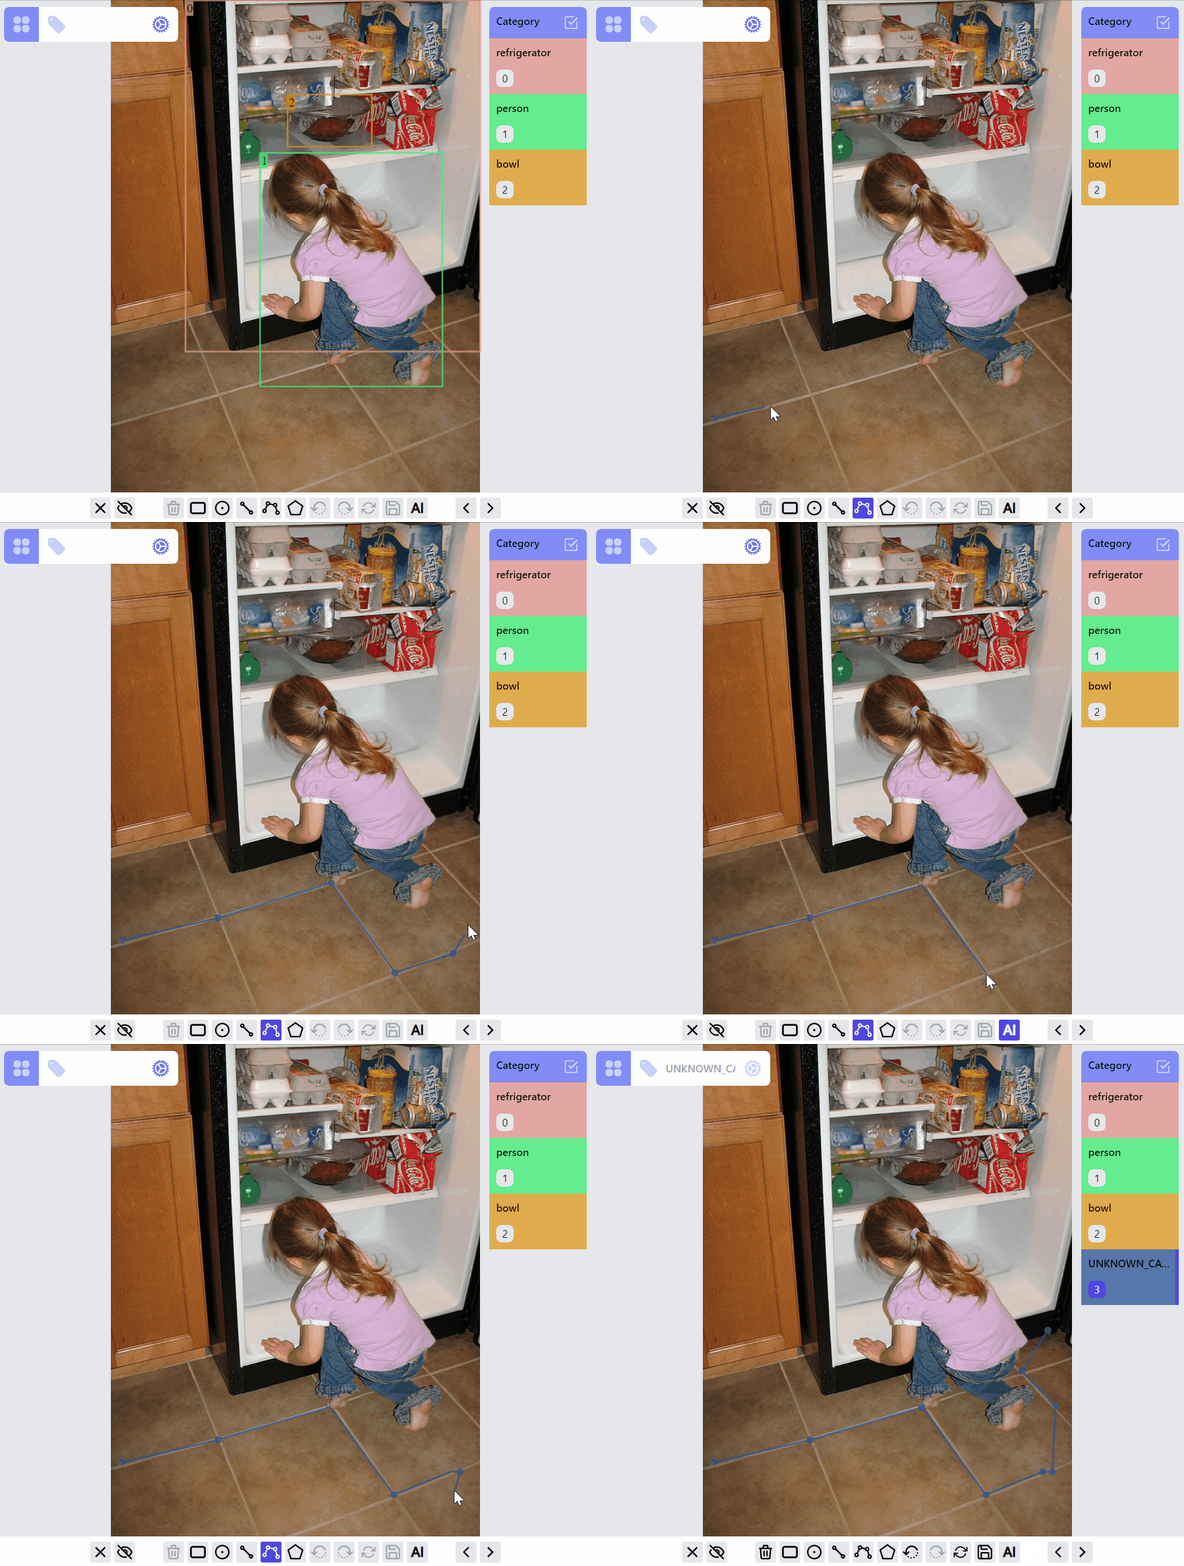
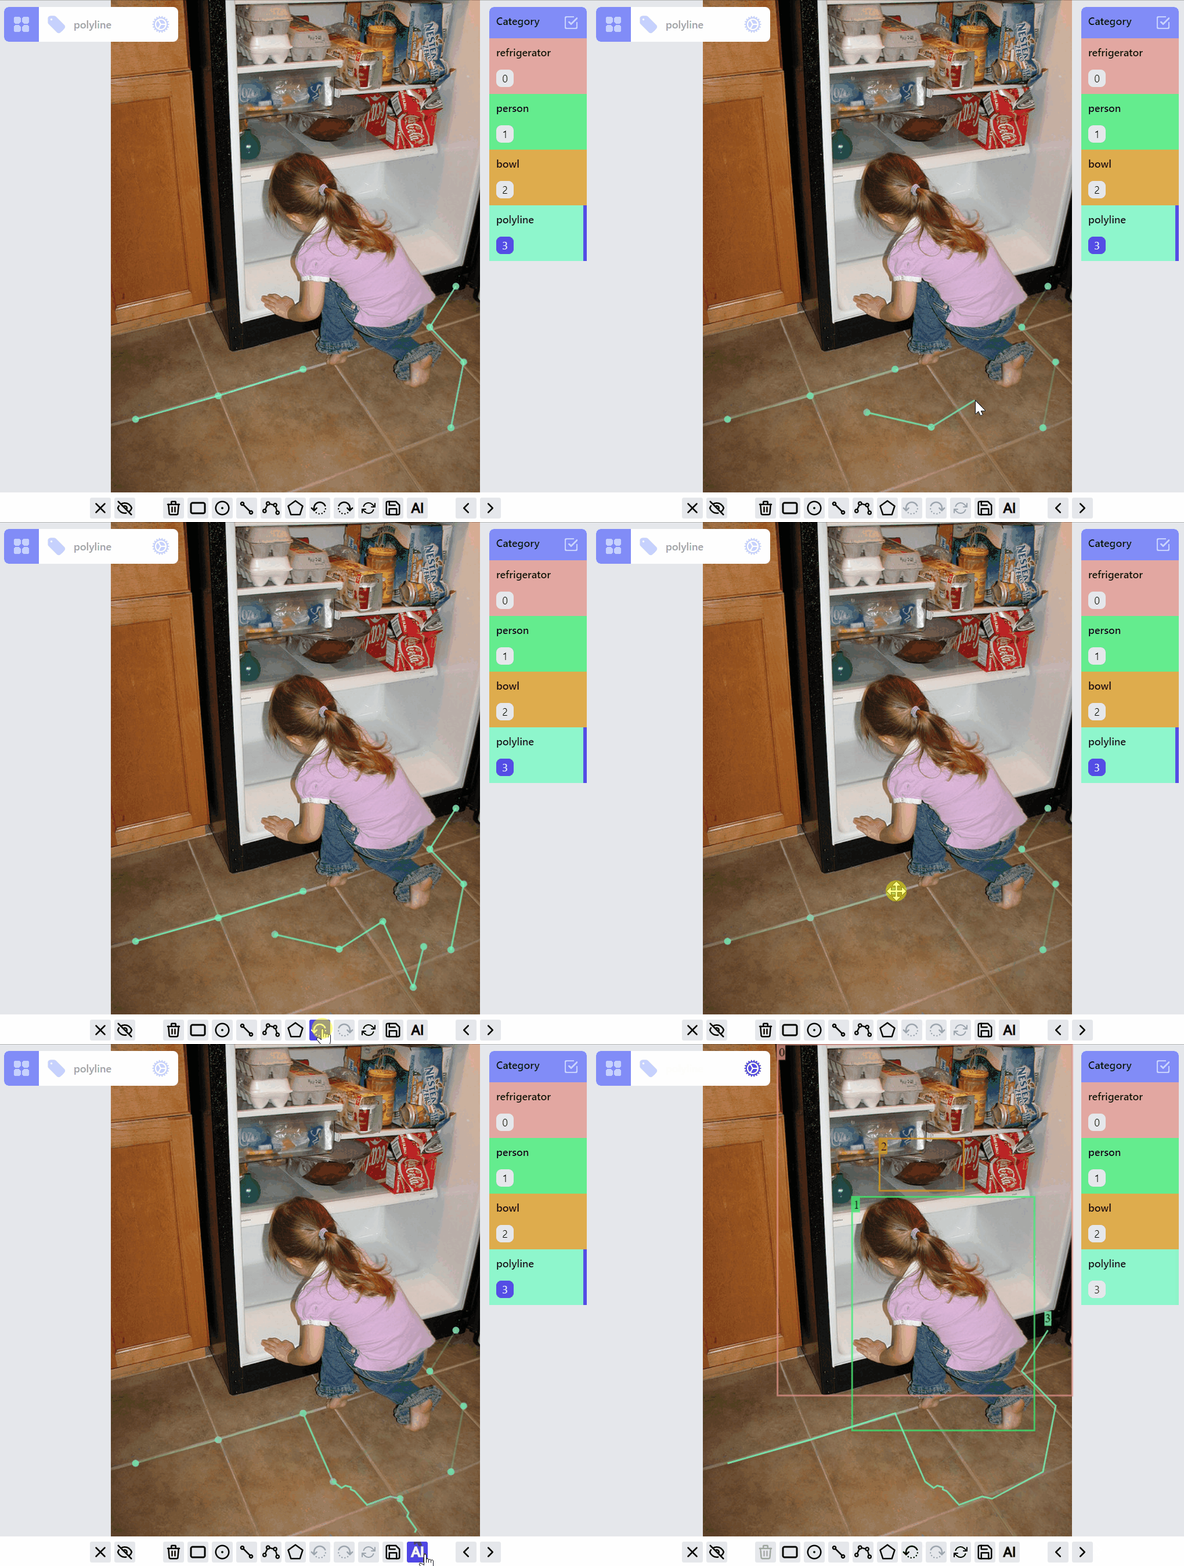
PolylineLabel ops
- drawing:
polyline:drawlistener group- right click will delete previous point
- switch on/off AI mode
- double click will stop drawing
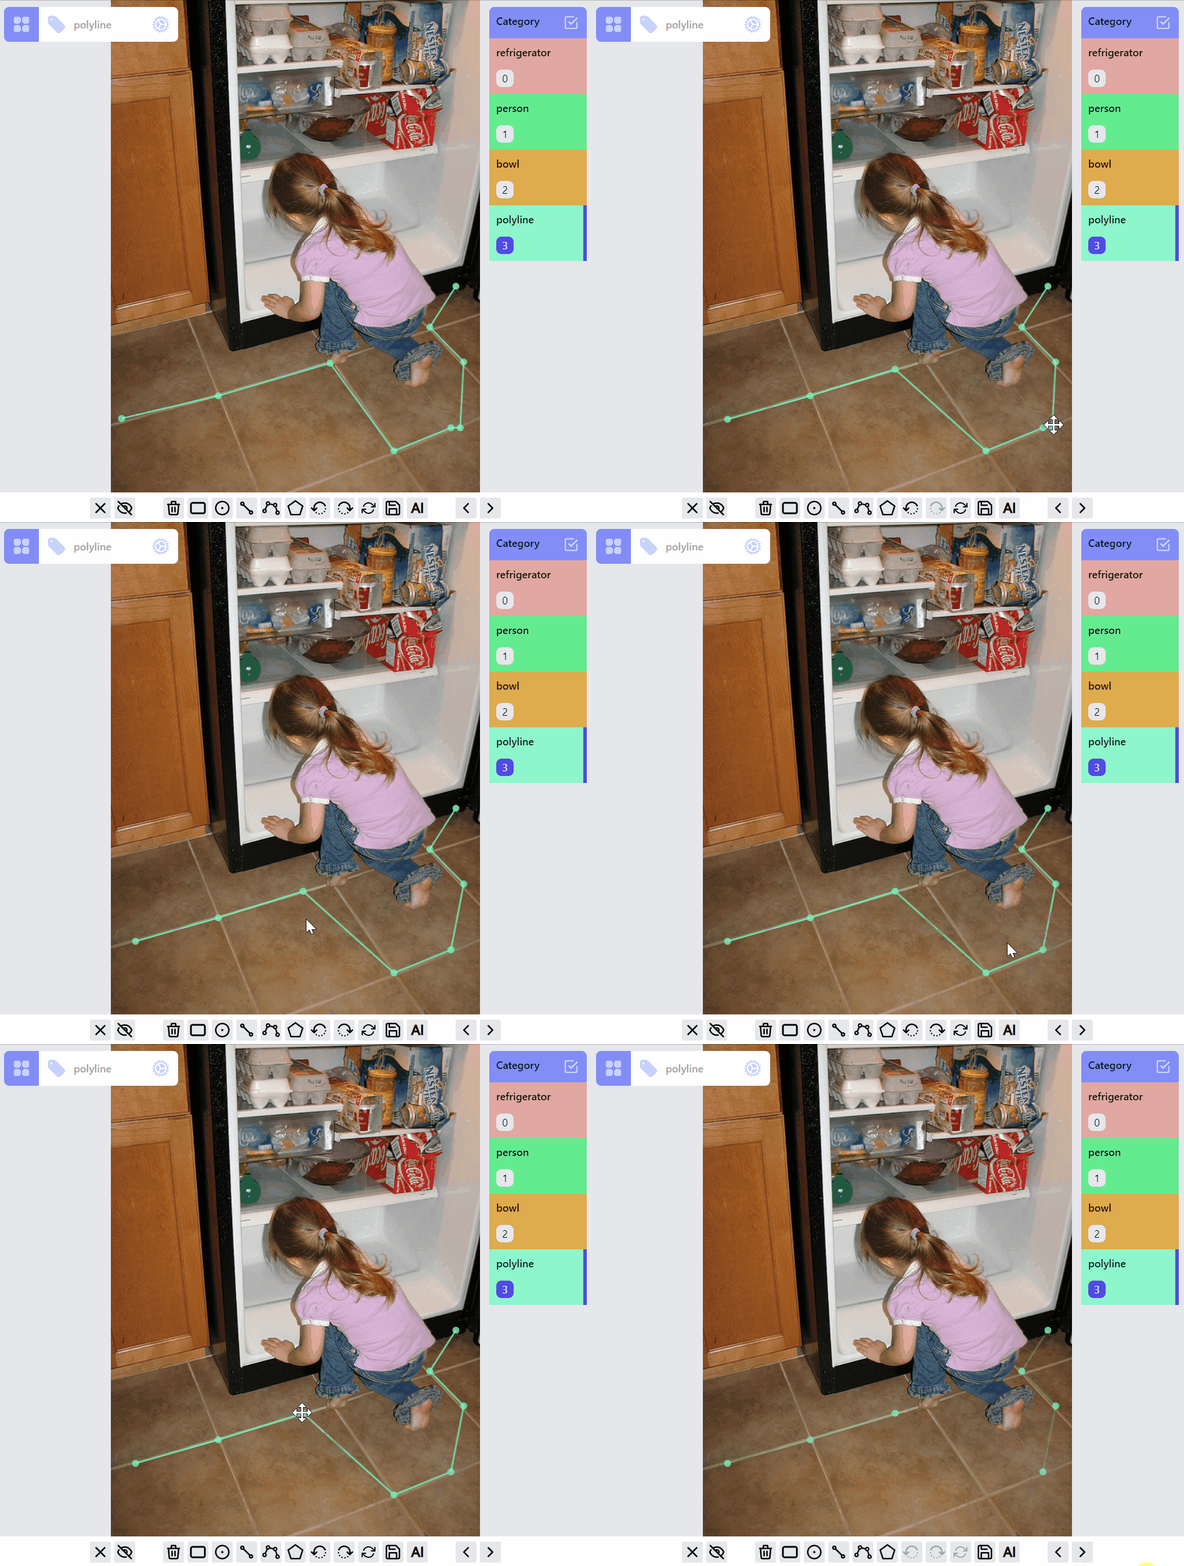
- editing:
polyline:editlistener group- right click will delete a point
- right click on point A, hold and release on point B will delete segments A-to-B or {lineStart-to-A, B-to-lineEnd} depending on it is case lineStart-A-B-lineEnd or it is case lineStart-B-A-lineEnd, in later case the polyline will be break into sub-polylines as intermediate state
- double click on a point will switch to advanced drawing mode
- advanced drawing:
polyline:draw:advancedlistener group- click on the endpoint of a polyline or sub-polyline will start extending it, otherwise it will start drawing a new sub-polyline
- double click will stop extending, if it is double clicked on an endpoint of another sub-polyline, then two sub-polylines will be merged
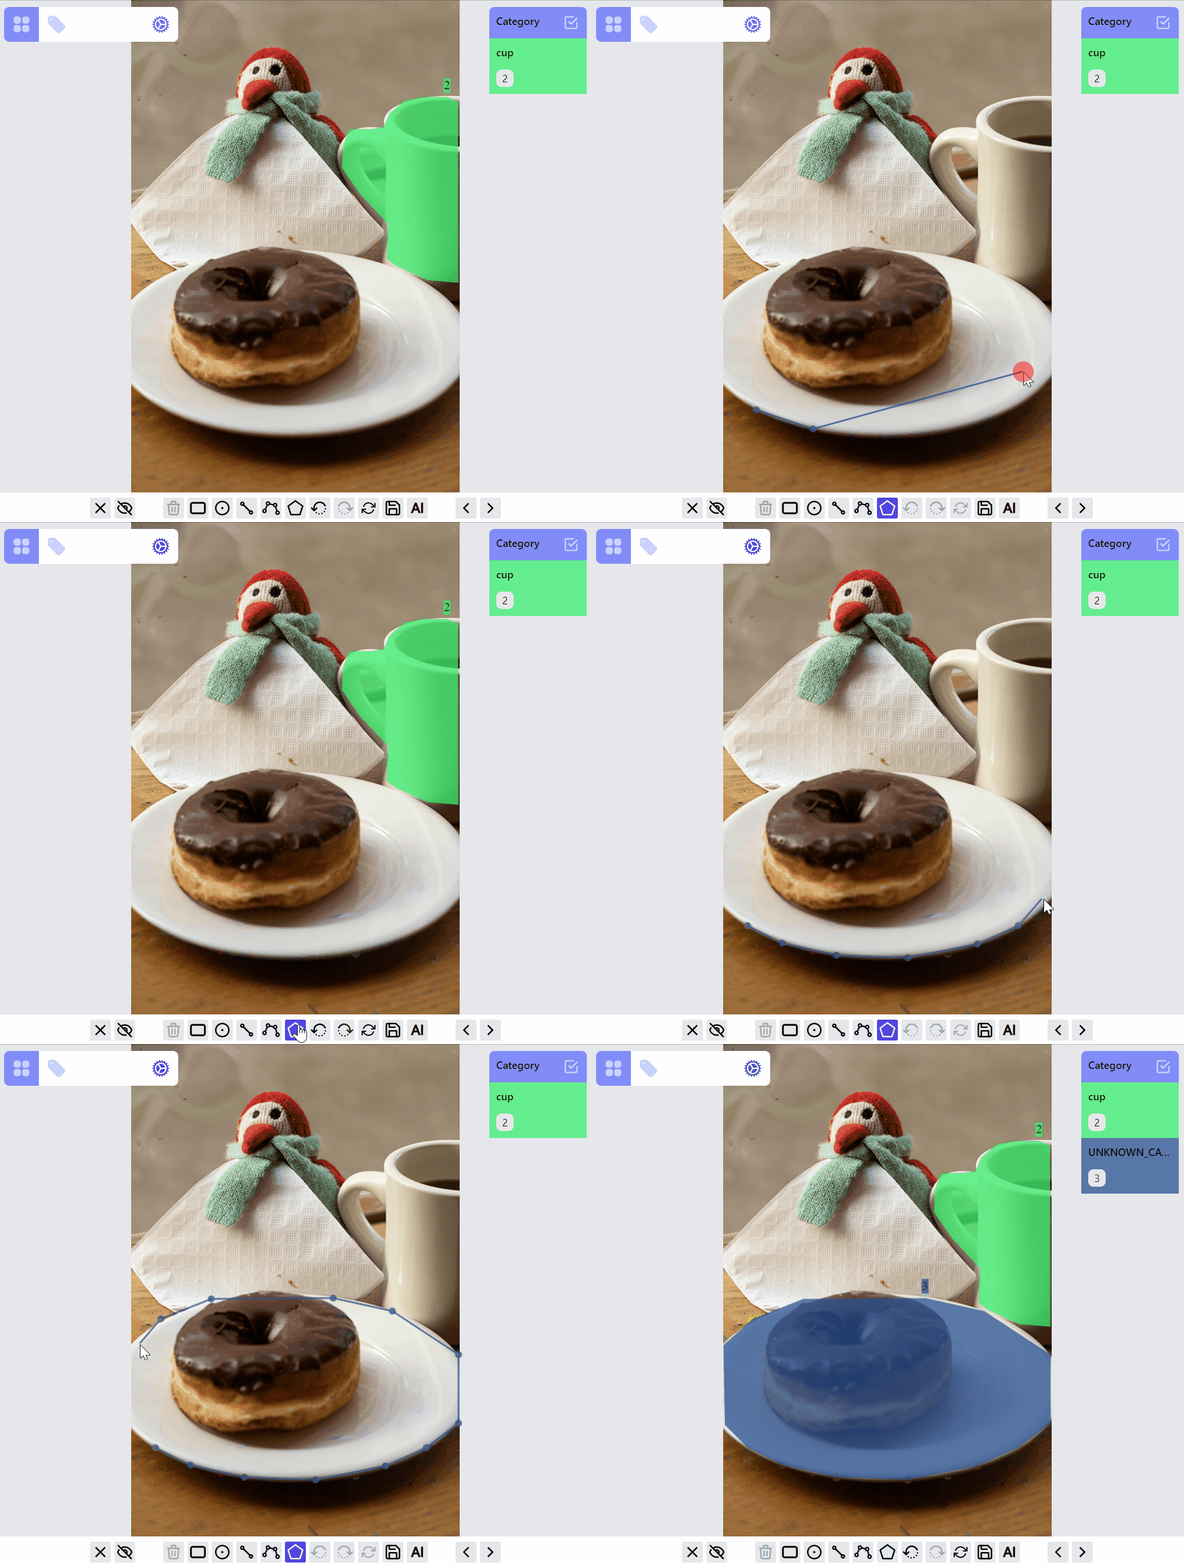
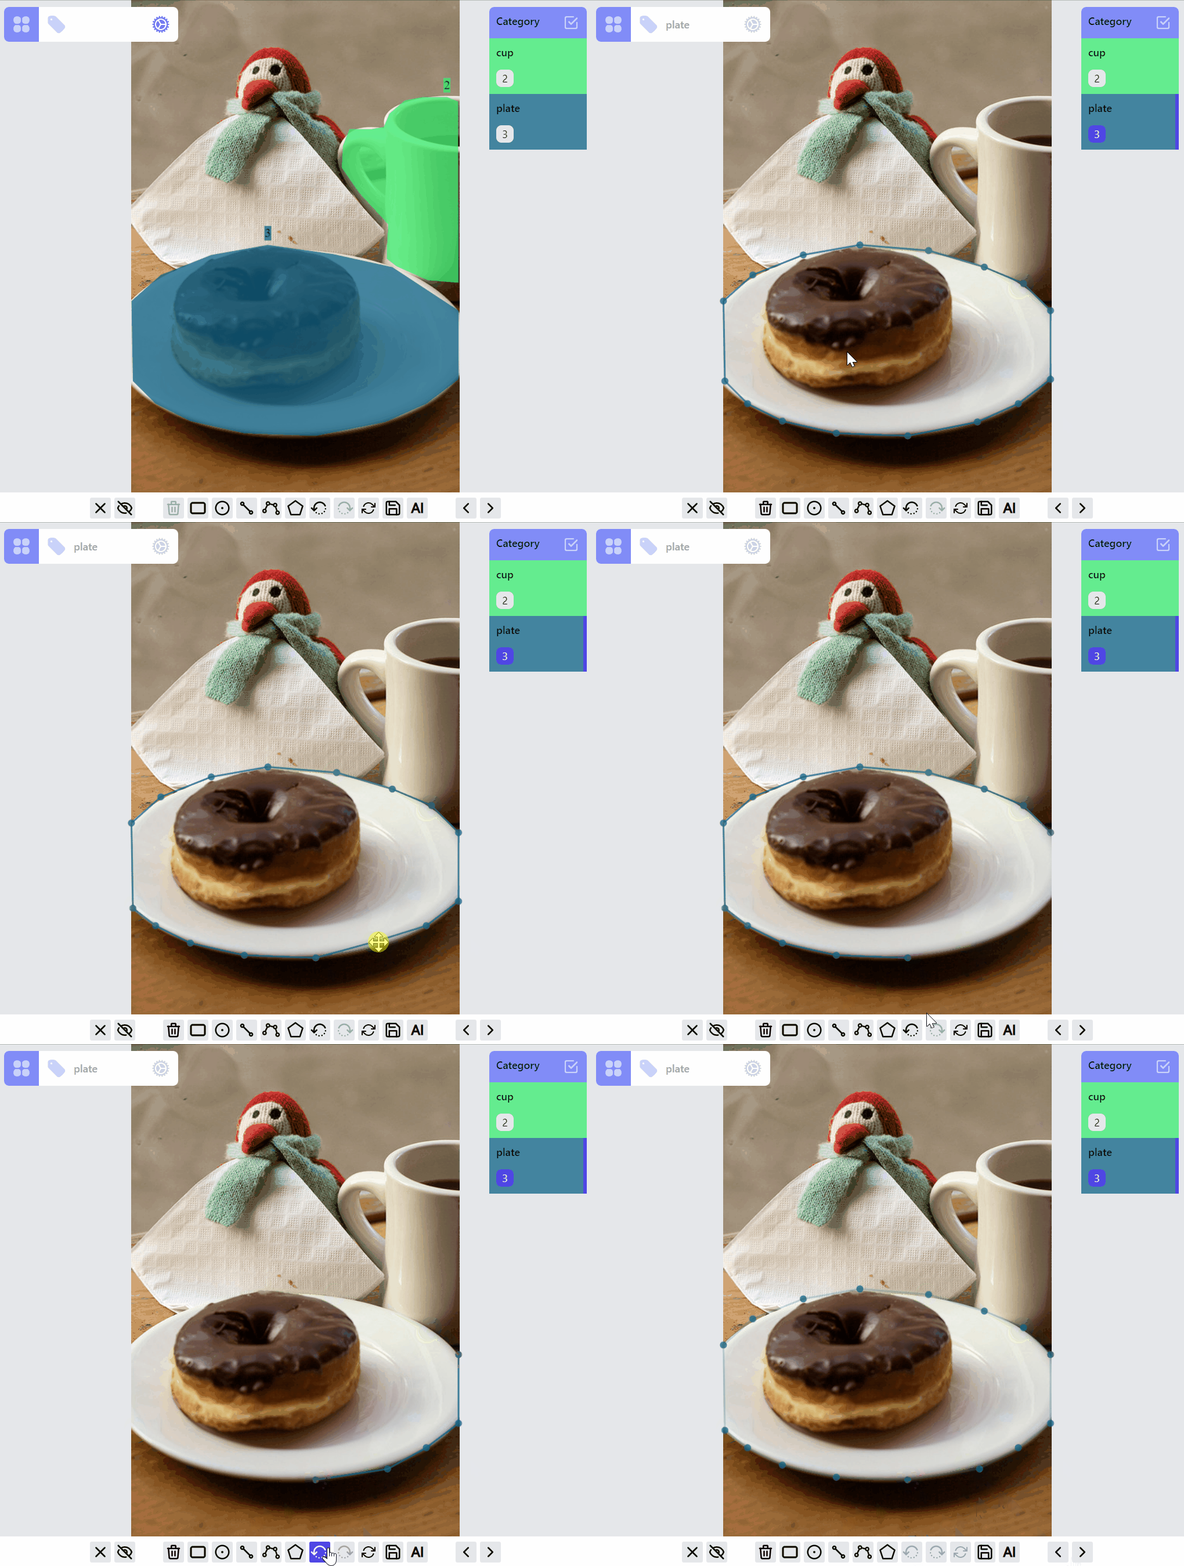
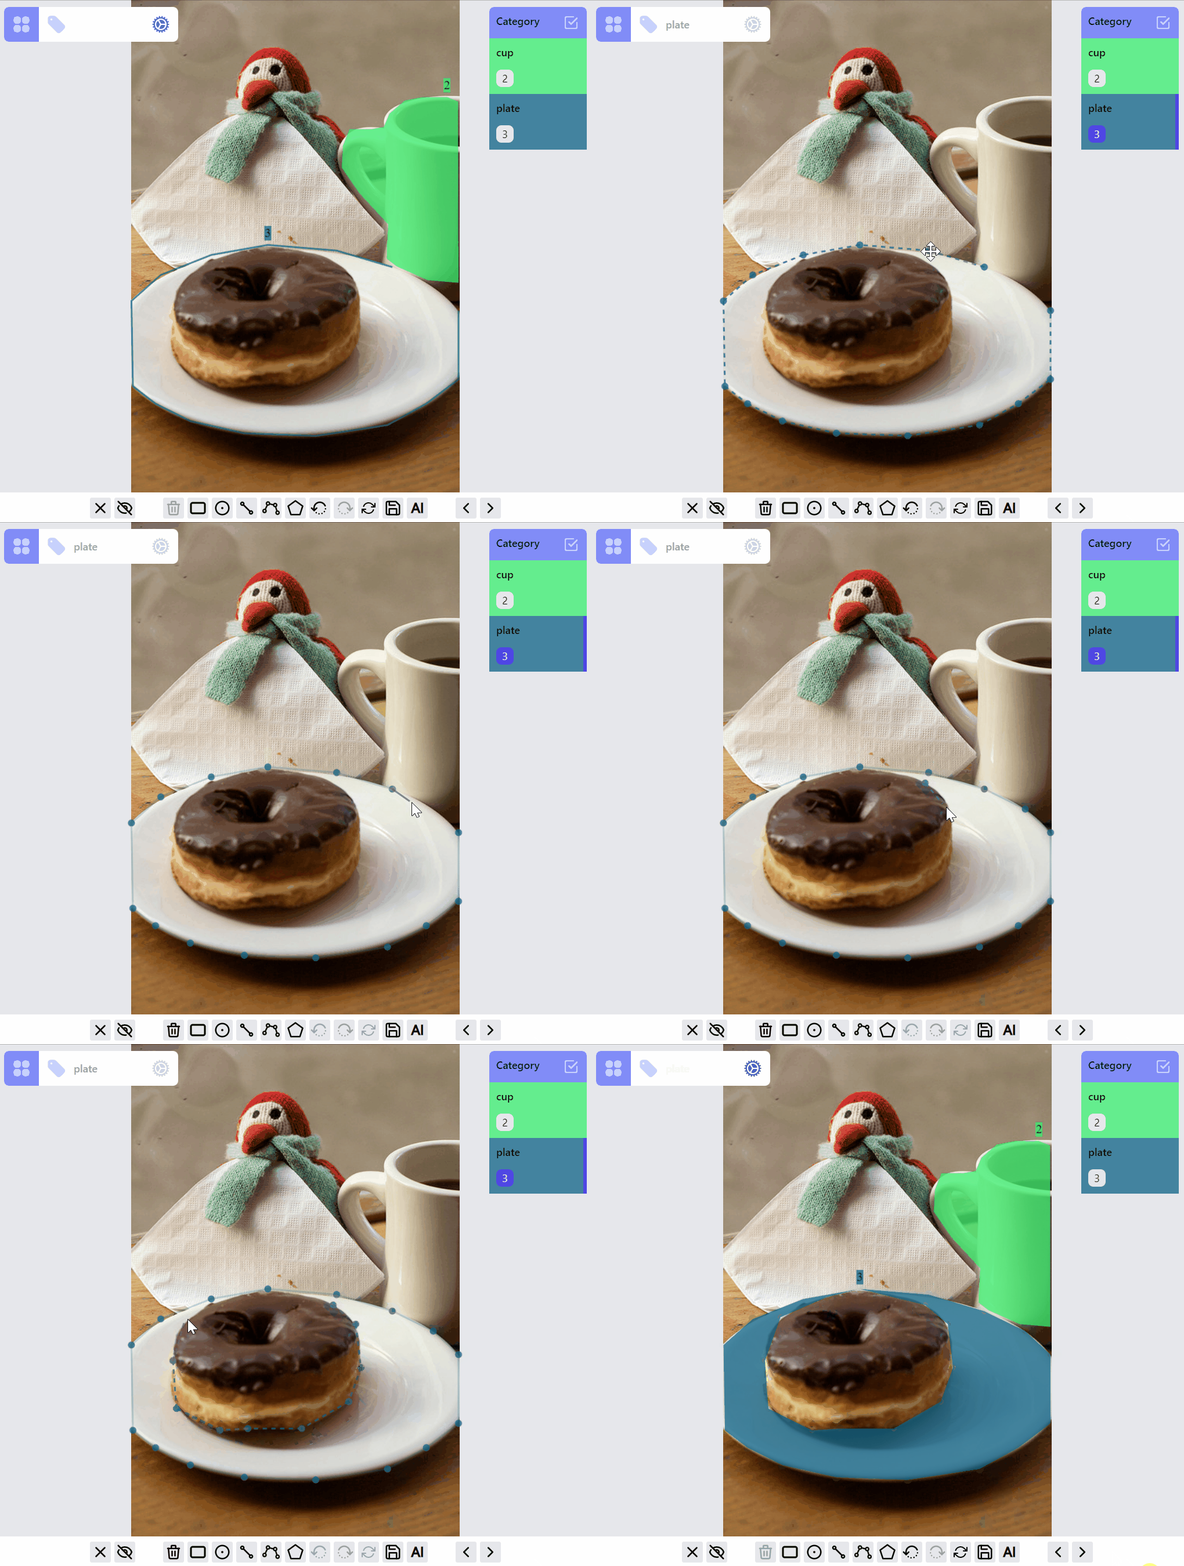
MaskLabel ops
MaskLabel has two properties closed, hole. A hole closed path encircled by a non-hole closed path will become a mask with hole.
- drawing:
mask:drawlistener group- right click will delete previous point
- double click will stop drawing, if it is double clicked on the starting point, then form a closed mask, otherwise form an open path
- editing:
mask:editlistener group- right click will delete a point
- right click on point A, hold and release on point B will delete segments A-to-B or {lineStart-to-A, B-to-lineEnd}
- double click on a point will switch to advanced drawing mode
- advanced drawing:
mask:draw:advancedlistener group- right click on a point will reverse hole property of the path
- left click on a point of a closed path, of a point that is not the endpoint of an open path, then no response
- left click on an endpoint of open path will start extending it
- click not on a point will start drawing a new path, with hole property true if right click and false if left click
- double click will stop extending, if it is double clicked on an endpoint of another path, then two paths will be merged
Limitations
The design of this library tries to strike a balance between the optimization of the annotation experience for each label type, and the consistency of the implementations among all the label types. Currently this leads to certain limitations:
- Touch screen is not supported
- Display on small screen is not optimized
- The library is based on fabricjs, which limits the label types and certain interactions. However, we are not limited in terms of what to use underhood, as we integrate more labels, we might bring in other lower level dependancies best suited for that label type.
License
Apache 2.0 © ZitySpace


