


angular-trix
A rich wysiwyg text editor directive for angularjs.
Angularjs directive for trix editor
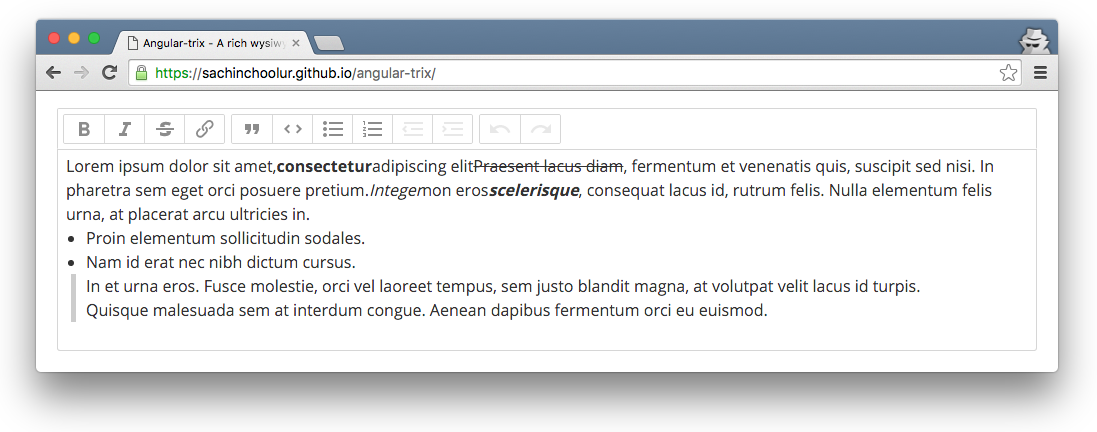 Demo
Demo
Angular-trix demo. Plunker demo
Install
You can get it on npm.
npm install angular-trix --save
Or bower, too.
bower install angular-trix --save
If you're not into package management, just download a ZIP file.
Setup
First, include angularjs, trix.js and trix.css into your document.
trix.css includes default styles for the Trix toolbar, editor, and attachments. Skip this file if you prefer to define these styles yourself.
To use your own polyfills, or to target only browsers that support all of the required standards, include trix-core.js instead.
Then Include angular-trix.js.
Add angularTrix dependency to your module
var myApp = angular;Create trix-editor
Place an empty <trix-editor></trix-editor> tag on the page. Trix will automatically insert a separate <trix-toolbar> before the editor.
Like an HTML <textarea>, <trix-editor> accepts autofocus and placeholder attributes. Unlike a <textarea>, <trix-editor> automatically expands vertically to fit its contents.
Finally, add angular-trix directive and ng-model to the <trix-editor></trix-editor>.
Styling Formatted Content
To ensure what you see when you edit is what you see when you save, use a CSS class name to scope styles for Trix formatted content. Apply this class name to your <trix-editor> element, and to a containing element when you render stored Trix content for display in your application.
The default trix.css file includes styles for basic formatted content—including bulleted and numbered lists, code blocks, and block quotes—under the class name trix-content. We encourage you to use these styles as a starting point by copying them into your application’s CSS with a different class name.
Observing Editor Changes
The <trix-editor> element emits several events which you can use to observe and respond to changes in editor state.
-
trix-initializefires when the<trix-editor>element is attached to the DOM and itseditorobject is ready for use. -
trix-changefires whenever the editor’s contents have changed. -
trix-selection-changefires any time the selected range changes in the editor. -
trix-focusandtrix-blurfire when the editor gains or loses focus, respectively. -
trix-file-acceptfires when a file is dropped or inserted into the editor. You can access the DOMFileobject through thefileproperty on the event. -
trix-attachment-addfires after an attachment is added to the document. You can access the Trix attachment object through theattachmentproperty on the event. If theattachmentobject has afileproperty, you should store this file remotely and set the attachment’s URL attribute. -
trix-attachment-removefires when an attachment is removed from the document. You can access the Trix attachment object through theattachmentproperty on the event. You may wish to use this event to clean up remotely stored files.
You can use the following attributes to listen the trix events and implement your custom logic. You can access trix event and editor instance parameters in controller.
trix-initializetrix-changetrix-selection-changetrix-focustrix-blurtrix-file-accepttrix-attachment-addtrix-attachment-remove
// You can still access the trix eventvar events = 'trixInitialize' 'trixChange' 'trixSelectionChange' 'trixFocus' 'trixBlur' 'trixFileAccept' 'trixAttachmentAdd' 'trixAttachmentRemove'; for var i = 0; i < eventslength; i++ $scopeeventsi = { console; }; For a live demonstration, open this site and just your console :)
Storing Attached Files
Trix automatically accepts files dragged or pasted into an editor and inserts them as attachments in the document. Each attachment is considered pending until you store it remotely and provide Trix with a permanent URL.
To store attachments, listen for the trix-attachment-add event. Upload the attached files with XMLHttpRequest yourself and set the attachment’s URL attribute upon completion. See the Plunker for detailed information.
If you don’t want to accept dropped or pasted files, addprevent-trix-file-accept = "true" attribute to the trix editor.
Editing Text Programmatically
You can manipulate a Trix editor programmatically through the Trix.Editor interface, available on each <trix-editor> element through its editor property. You can access editor property in controller via trix event parameter.
// Controller // @e trix event// @editor Trix.Editor instance$scope {}Understanding the Document Model
The formatted content of a Trix editor is known as a document, and is represented as an instance of the Trix.Document class. To get the editor’s current document, use the editor.getDocument method.
$scope { editor // is a Trix.Document instance}You can convert a document to an unformatted JavaScript string with the document.toString method.
$scope { var document = editor document // is a JavaScript string}Getting and Setting the Selection
Trix documents are structured as sequences of individually addressable characters. The index of one character in a document is called a position, and a start and end position together make up a range.
To get the editor’s current selection, use the editor.getSelectedRange method, which returns a two-element array containing the start and end positions.
$scope { editor // [0, 0]}You can set the editor’s current selection by passing a range array to the editor.setSelectedRange method.
$scope { // Select the first character in the document editor}Collapsed Selections
When the start and end positions of a range are equal, the range is said to be collapsed. In the editor, a collapsed selection appears as a blinking cursor rather than a highlighted span of text.
For convenience, the following calls to setSelectedRange are equivalent when working with collapsed selections:
$scope { editor editor editor}Directional Movement
To programmatically move the cursor or selection through the document, call the editor.moveCursorInDirection or editor.expandSelectionInDirection methods with a direction argument. The direction can be either "forward" or "backward".
$scope { // Move the cursor backward one character editor // Expand the end of the selection forward by one character editor}Converting Positions to Pixel Offsets
Sometimes you need to know the x and y coordinates of a character at a given position in the editor. For example, you might want to absolutely position a pop-up menu element below the editor’s cursor.
Call the editor.getClientRectAtPosition method with a position argument to get a DOMRect instance representing the left and top offsets, width, and height of the character at the given position.
$scope { var rect = editor rectleft recttop // [17, 49]}Inserting and Deleting Text
The editor interface provides methods for inserting, replacing, and deleting text at the current selection.
To insert or replace text, begin by setting the selected range, then call one of the insertion methods below. Trix will first remove any selected text, then insert the new text at the start position of the selected range.
Inserting Plain Text
To insert unformatted text into the document, call the editor.insertString method.
$scope { // Insert “Hello” at the beginning of the document editor editor}Inserting HTML
To insert HTML into the document, call the editor.insertHTML method. Trix will first convert the HTML into its internal document model. During this conversion, any formatting that cannot be represented in a Trix document will be lost.
$scope { // Insert a bold “Hello” at the beginning of the document editor editor}Inserting a File
To insert a DOM File object into the document, call the editor.insertFile method. Trix will insert a pending attachment for the file as if you had dragged and dropped it onto the editor.
$scope { // Insert the selected file from the first file input element var file = documentfile editor}Inserting a Line Break
To insert a line break, call the editor.insertLineBreak method, which is functionally equivalent to pressing the return key.
$scope { // Insert “Hello\n” editor editor}Deleting Text
If the current selection is collapsed, you can simulate deleting text before or after the cursor with the editor.deleteInDirection method.
$scope { // “Backspace” the first character in the document editor editor // Delete the second character in the document editor editor}To delete a range of text, first set the selected range, then call editor.deleteInDirection with either direction as the argument.
$scope { // Delete the first five characters editor editor}Working With Attributes and Indentation
Trix represents formatting as sets of attributes applied across ranges of a document.
By default, Trix supports the inline attributes bold, italic, href, and strike, and the block-level attributes quote, code, bullet, and number.
Applying Formatting
To apply formatting to the current selection, use the editor.activateAttribute method.
$scope { editor editor editor}To set the href attribute, pass a URL as the second argument to editor.activateAttribute.
$scope { editor editor editor}Removing Formatting
Use the editor.deactivateAttribute method to remove formatting from a selection.
$scope { editor editor}Formatting With a Collapsed Selection
If you activate or deactivate attributes when the selection is collapsed, your formatting changes will apply to the text inserted by any subsequent calls to editor.insertString.
$scope { editor editor}Adjusting the Indentation Level
To adjust the indentation level of block-level attributes, call the editor.increaseIndentationLevel and editor.decreaseIndentationLevel methods.
$scope { editor editor editor}Using Undo and Redo
Trix editors support unlimited undo and redo. Successive typing and formatting changes are consolidated together at five-second intervals; all other input changes are recorded individually in undo history.
Call the editor.undo and editor.redo methods to perform an undo or redo operation.
$scope { editor editor}Changes you make through the editor interface will not automatically record undo entries. You can save your own undo entries by calling the editor.recordUndoEntry method with a description argument.
$scope { editor editor}License
MIT License