atlas-scalar-noise
An implementation of 2D value noise, used to generate smooth grids of noise.

install
npm install --save atlas-scalar-noise
why
I was introduced to Perlin noise, which I thought was pretty neat. I wanted to try and implement it myself, but instead ended up implementing value noise, which is much simpler and tends to look more digital than Perlin noise.
When generating random numbers (noise), we will often want to interpolate between them to make the noise appear blurry and smooth (like a gas cloud). On a large scale, the generated noise should appear random, however on a small scale, adjacent values should be very close to each other.
Value noise is pretty simple to understand:
- Generate a rectangular grid of random numbers between 0 and 1.
- Interpolate between the lattice points so that transitions between their values are smooth.
For example, if I generate two adjacent random numbers [.51, .42], plotting them next to each other will result in a discontinuous-looking step (delta = .09). I might want to smooth the transition with 2 intermediate values: [.51, .48, .45, .42]. In this interpolation, our delta = .03, which is smaller, making the values appear closer together. We can generalize this simple, one-dimensional example to N dimensions, but for now we'll stick with two dimensions.
examples
generating a grid
Value noise requires a random grid to work. The grid defines random values at various points on your image. All of the values in between are implied with linear interpolation and cubic smoothing. Smoothing helps remove linear artifacts in the output image.
rectangular grid
We can generate pseudorandom rectangular grids:
const ScalarNoiseGenerator = ;// generates a 100x200 gridconst rectGrid = 100 200;square grid
We can also generate square grids:
...// generates a 100x100 gridconst squareGrid = 100 generating noise
Once we've generated our grid, we can use that grid to generate noise. The grid defines an NxM lattice of pseudorandom points. We can get pixels at the grid lattice points, and/or between them if we want. For the rest of these examples, let's assume we have a Canvas API which lets us generate an empty canvas, set pixels on it and print the resultant image. We'll use the square grid we created in the example above for simplicity, but feel free to play around with rectangular grids, too.
regular noise
We don't have to interpolate our lattice if we don't want to. For example, if we only get pixels at exactly the grid lattice points, we will end up with regular noise, with the output image being identical to the grid:
...const Canvas = ;const squareCanvas = 100 100 for let x = 100; x--; for let y = 100; y--; // multiply noise value 255 to set greyscale val between 0 and 255 squareCanvas squareCanvas
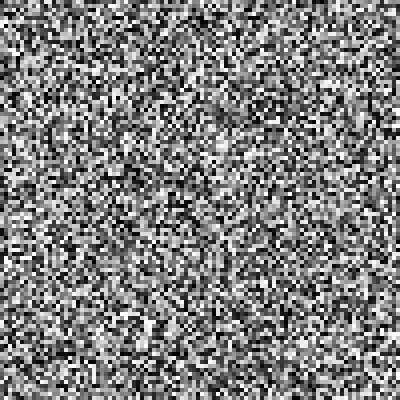
Keep in mind, this image was originally 100x100. I've blown up the image by a factor of 4 so you can see the individual pixels more easily. As you can see, all of the adjacent pixels are random and uninterpolated, just like regular noise. That's because we only called squareGrid.getPixel at the exact grid lattice points. We didn't tell our value noise generator to get pixels in between the lattice points!
value noise
Okay, so we've seen how we can generate boring noise from only the grid lattice points. But we want value noise! We can use the grid to generate pixels in between the lattice points, giving us proper value noise. In order to get pixels in between the lattice points, we need to increment our x and y values by amounts less than one. We can divide our x and y values by a scale factor. A scale factor of 4 tells the generator that we are interested in interpolating 3 brand new values in between every grid point. The x values will be: [0, .25, .5, .75, 1, ..., 99, 99.25, 99.5, 99.75] for a total of 400 values. This is also true for the y values, since our grid is a square.
...const size = 400;const scaleFactor = 4;const squareCanvas = size size;for let x = size; x--; for let y = size; y--; squareCanvas squareCanvas
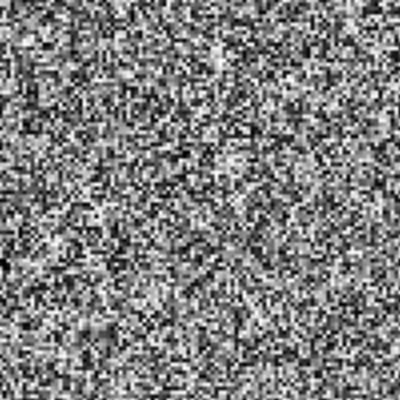
As you can see, the noise looks "smoother" than in the previous example. This is because we are interpolating and smoothing values between the grid lattice points. Wait, this still looks pretty noisy and ugly as hell -- we want better looking value noise.
better value noise
The reason why the example above still looks pretty rough is that we aren't interpolating enough values in between our grid points. The more we interpolate, the smoother the output image will look. In this example, we will use a smaller grid and interpolate more values in between the lattice points, while keeping our canvas a square of size 400.
...const smallSquareGrid = 10const size = 400;const scaleFactor = 40;const squareCanvas = size size;for let x = size; x--; for let y = size; y--; squareCanvas squareCanvas
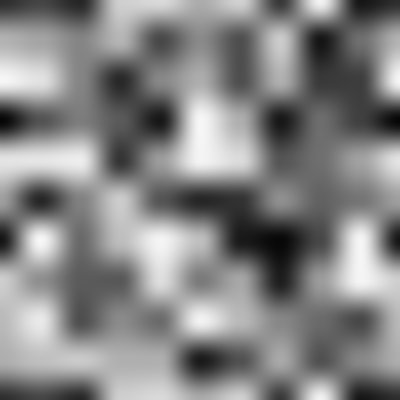
That looks more like it! Since our scale factor is larger and we divide our x and y values by it, more points will be generated in between each grid point. Namely, there will be 39 interpolation points between every grid lattice point, as opposed to only 3 in the previous example. For example, our new x values are: [0, .025, .05, ..., 9.925, 9.95, 9.975] for a grand total of 400 values. This is also true for the y values, since our grid is a square.
As you can see, our features are much larger and it looks much smoother. I've always thought that value noise had a blocky, digital feeling to it -- kind of like a blurry sattelite photo of buildings and parking lots.
infinite value noise
You might we wondering what happens if we try to generate noise for x and y values which are not inside of our grid. For example, if we have a grid of size 10x10, what happens if we try grid.getPixel(11,11)? This is outside of our grid, so will it work? Let's try it using our small square grid:
...const size = 400;const scaleFactor = 10;const squareCanvas = size size;for let x = size; x--; for let y = size; y--; squareCanvas squareCanvas
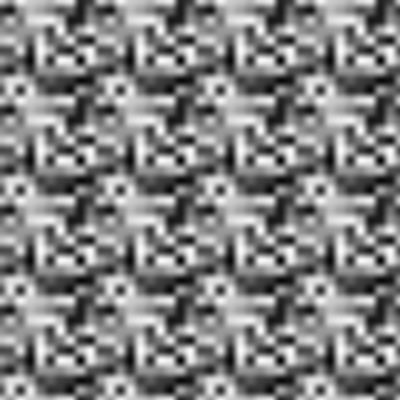
Notice how the noise seems to repeat itself. This is because ScalarNoiseGenerator implements periodic boundary conditions -- if you try and reach for a pixel that isn't inside the grid's boundary, it will "wrap around" and get the value from the beginning of the grid. To answer the question above, if we have a grid size of 10x10 and try grid.getPixel(11,11), we would really just be getting the value of grid.getPixel(1,1).
To understand why this example tesselated, we need to look at our scale factor. It was reduced from 40 to 10 without changing our canvas size, meaning the x values become: [0, .1, .2, ..., 39.7, 39.8, 39.9] for a total of 400 points. This is also true for the y values, since our grid is a square. Notice how we almost go up to 40 in both dimensions -- meaning we are "wrapping" around our 10x10 grid three extra times.
This tesselation is useful when you want to try and create repeating patterns from some base grid, or if you want to indefinitely continue noise in some direction.
fractal value noise
Now that we understand how to generate value noise, let's create a gas cloud. First, let's understand what a frequency spectrum is. You can represent a continuous function (like an image) as a sum of various frequencies -- when you generate value noise with lots of interpolation points (like in our third example), you'll end up with larger features, signifying lower frequencies. If you use fewer interpolation points (like in our first couple of examples), you'll end up with very fine-grained features, signifying higher frequencies.
Fractal noise is where you reduce contributions from higher frequency signals according to a power law, as opposed to white noise which has a uniform contribution from all frequencies. In this example, we'll use the same grid to generate the final image fractal, but you could also use different grids to avoid potential artifacts:
...const size = 400;// scale factors should add up to 400 // so we're not getting an artificially dark imageconst scaleFactors = 200 100 50 20 12 8 6 4;const squareCanvas = size size; for let x = size; x--; for let y = size; y--; const noiseValue = scaleFactors squareCanvas squareCanvas
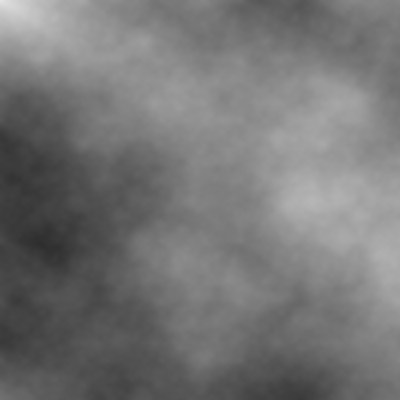
This is what pink noise looks like -- it reminds me of the gas in The Elder Scrolls V: Skyrim's main start menu screen. You might notice some strange radial artifacts towards the center. This may be due to using the same grid for each frequency component. You may get unwanted constructive and destructive interference or other linear repetitions as in this example:
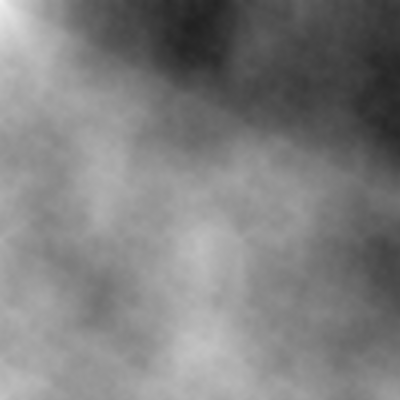
fractal value noise with unique grids
Let's copy the example above, but instead use a different random grid for each of our frequency components:
...const makeGrid = 10const size = 400;const scaleFactors = 200 100 50 20 12 8 6 4;const grids = ArrayscaleFactorslengthconst squareCanvas = size size; for let x = size; x--; for let y = size; y--; const noiseValue = scaleFactors squareCanvas squareCanvas
Overall, there seem to be fewer artifacts when using unique grids for each frequency component.
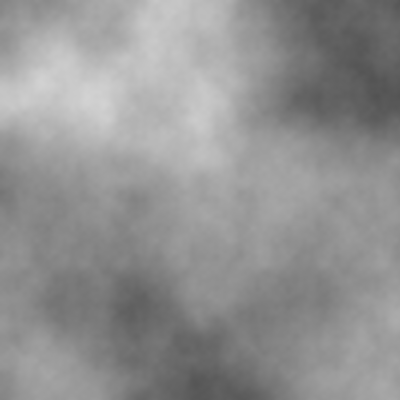
scanning tunnelling microscopy
In our final example, we'll use value noise to generate a picture which looks a lot like a picture of an atomic lattice:
...const size = 400;const quantumNoise = sizeconst atomicLattice = 2const squareCanvas = size size;const scaleFactor = 10; for let x = size; x--; for let y = size; y--; const noiseValue = 1 * quantumNoise + 9 * atomicLattice squareCanvas squareCanvas

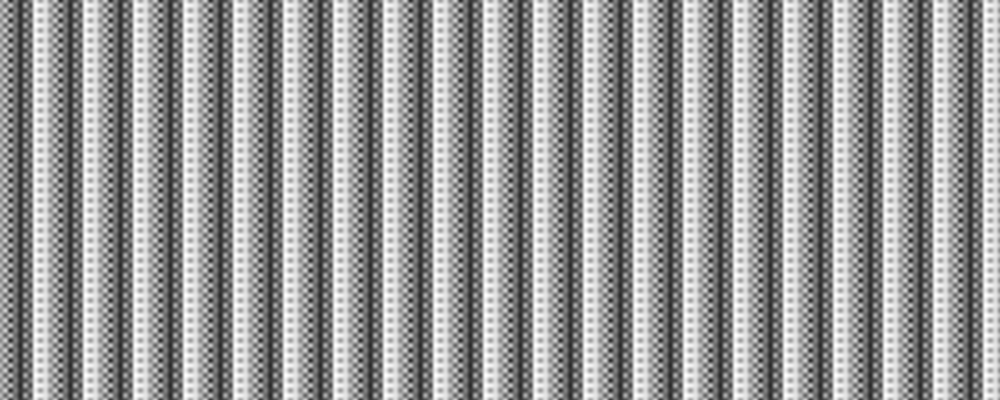
other notable examples
If you play around enough with value noise, you can stumble upon some pretty interesting textures. For example, this value noise looks a lot like stacked metal springs or staples:

If you added some color, this example would look a lot like a rug pattern:
By now, hopefully it's clear how useful value noise can be for generating digital artwork and other graphics.
caveats
Not fully optimized! For educational purposes and fun.