canvas-tile-map
This package allows you to create a tile map game using an HTML Canvas element, and a few lines of JavaScript.
Table of Contents
Install
npm install --save canvas-tile-mapUsage
Add a canvas element somewhere in your HTML file, and give it an ID:
Then in a JavaScript file:
var Game = Game; var settings = // put your settings here;var game = setting;game;Add your JavaScript file to your HTML using Browserify, Webpack, or anything, and you're all set!
Settings
The settings object you create holds all of the information of your game. There are many optional settings to fully customize your game, but only a few are required.
Required Settings
- canvasID: The ID you assigned to your canvas element
- map: An object containing features of your map
- layers: A list of matrices containing the layout of your tiles (see layers)
- tileHeight: The height of each tile in pixels
- tileWidth: The width of each tile in pixels
- spriteSheet: An object containing information about your spritesheet (see Sprite Sheet)
- src: The location of the file
- imageCount: The # of sprites in the sheet
- imageHeight: The height of each sprite in pixels
- imageWidth: The width of each sprite in pixels
example:
var settings = canvasID: "tile-map" map: layers: layers tileHeight: 50 tileWidth: 50 spriteSheet src: "path/to/spriteSheet.png" imageCount: 5 imageHeight: 64 imageWidth: 64 Sprite Sheet
The sprite sheet is one file contains all of the images(sprites) you'd like to use as tiles. The sprites should all be the same size and should aligned horizontally.
Each sprite will be assigned a number starting with 1. That number will be used as a reference to that sprite.
Here is an example:
spriteSheet: src: './src/examples/static/images/tiles.png' imageCount: 5 imageHeight: 64 imageWidth: 64would be:

with number references of [1, 2, 3, 4, 5] which means grass, dirt, tree-bottom, tree-top, bush
Layers
Layers respresent the entire layout of your map's tiles. Use the number references to your sprite sheet to create a grid of your map.
Single Layer
var layers = 1 1 1 1 1 2 2 1 1 1 1 1 1 1 1 2 2 2 2 1 1 1 1 1 1 1 1 1 2 1 1 1 1 1 1 1 1 1 2 1 1 1 1 2 2 2 2 2 2 1 1 1 1 2 1 1 1 1 1 1 1 1 1 2 1 1 1 1 1 1 1 1 1 2 2 1 1 1 1 1 1 1 1 1 2 1 1 1 1 1 1 1 1 1 2 1 1 1 1 1 ; var settings = layers: layers // etc.;would make:
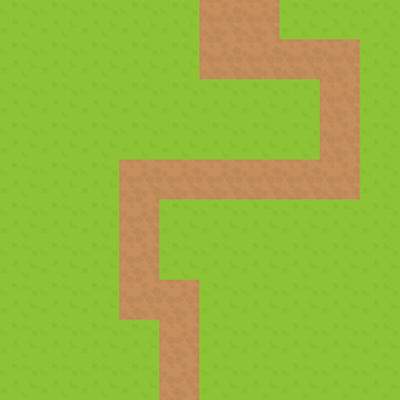
Note The 'layer' is nested inside the list of layers
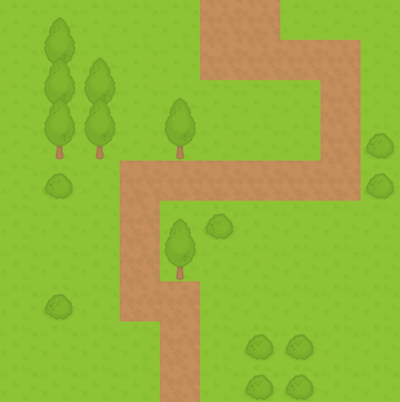
Multiple Layers
To support multiple layers, simply add more layers to your layers
var layers = // base layer 1 1 1 1 1 2 2 1 1 1 1 3 1 1 1 2 2 2 2 1 1 3 3 1 1 1 1 1 2 1 1 3 3 1 3 1 1 1 2 1 1 1 1 2 2 2 2 2 2 1 1 1 1 2 1 1 1 1 1 1 1 1 1 2 3 1 1 1 1 1 1 1 1 2 2 1 1 1 1 1 1 1 1 1 2 1 1 1 1 1 1 1 1 1 2 1 1 1 1 1 // a layer with some bushes & trees 0 4 0 0 0 0 0 0 0 0 0 4 4 0 0 0 0 0 0 0 0 4 4 0 4 0 0 0 0 0 0 0 0 0 0 0 0 0 0 5 0 5 0 0 0 0 0 0 0 5 0 0 0 0 4 5 0 0 0 0 0 0 0 0 0 0 0 0 0 0 0 5 0 0 0 0 0 0 0 0 0 0 0 0 0 0 5 5 0 0 0 0 0 0 0 0 5 5 0 0 ; var settings = layers: layers // etc.;would make:
Additional Settings
Camera
The camera is the viewport for the portion of the map that is currently being shown. If the camera's dimensions are smaller than the map, then the arrow keys on the keyboard will move the camera around the map.
Settings
- height: The camera's height in pixels
- width: The camera's width in pixels
- speed: How fast the camera moves in pixels/second
example:
camera: height: 300 width: 300 speed: 150Character
A character can be placed inside the map and can move around with the arrow keys. The character is placed in the center of the screen (whenever possible).
Settings
- src: The location of the character's image file
- height: The height of the character (on screen) in pixels
- width: The width of the character (on screen) in pixels
- speed: How fast the character moves in pixels/second
Optional Settings
- startX: The character's starting x position on the map (from the left) - defaults to 0
- startY: The character's starting y position on the map (from the top) - defaults to 0
- layer: The layer after which the character should be drawn - defaults to 1
- collisionPoints: A list of
[x, y]coordinates, each of which will be tested for collisions. Defaults to the perimeter of the image. See Collision Points.
example:
character: src: "path/to/character.png" height: 40 width: 40 speed: 150 startX: 47 startY: 96 layer: 2Collision Points
The collision points allow you to customize what parts of the character can collide with impassable tiles. This is a very useful tool, but requires you to know the exact pixels (from the top left corner of the image) and manually create a list.
IMPORTANT: The coordinates you provide are based on the size of the image when it is drawn to the screen. i.e. character.height & character.width. It is recommended to resize the image to what you want on screen, and then determine the collision points using the resized image.
Examples
For full examples, check out the demos and their source code.
License
MIT