
react-native-i18n
Integrates I18n.js with React Native. Uses the user preferred locale as default.
Installation
Using yarn (recommended)
$ yarn add react-native-i18n
Using npm
$ npm install react-native-i18n --save
Automatic setup
After installing the npm package you need to link the native modules.
If you're using React-Native >= 0.29 just link the library with the command react-native link.
If you're using React-Native < 0.29, install rnpm with the command npm install -g rnpm and then link the library with the command rnpm link.
If you're having any issue you can also try to install the library manually as follows.
Automatic setup with Cocoapods
After installing the npm package, add the following line to your Podfile
pod 'RNI18n', :path => '../node_modules/react-native-i18n'and run
pod install
Manual setup
iOS
Add RNI18n.xcodeproj to Libraries and add libRNI18n.a to Link Binary With Libraries under Build Phases.
More info and screenshots about how to do this is available in the React Native documentation.
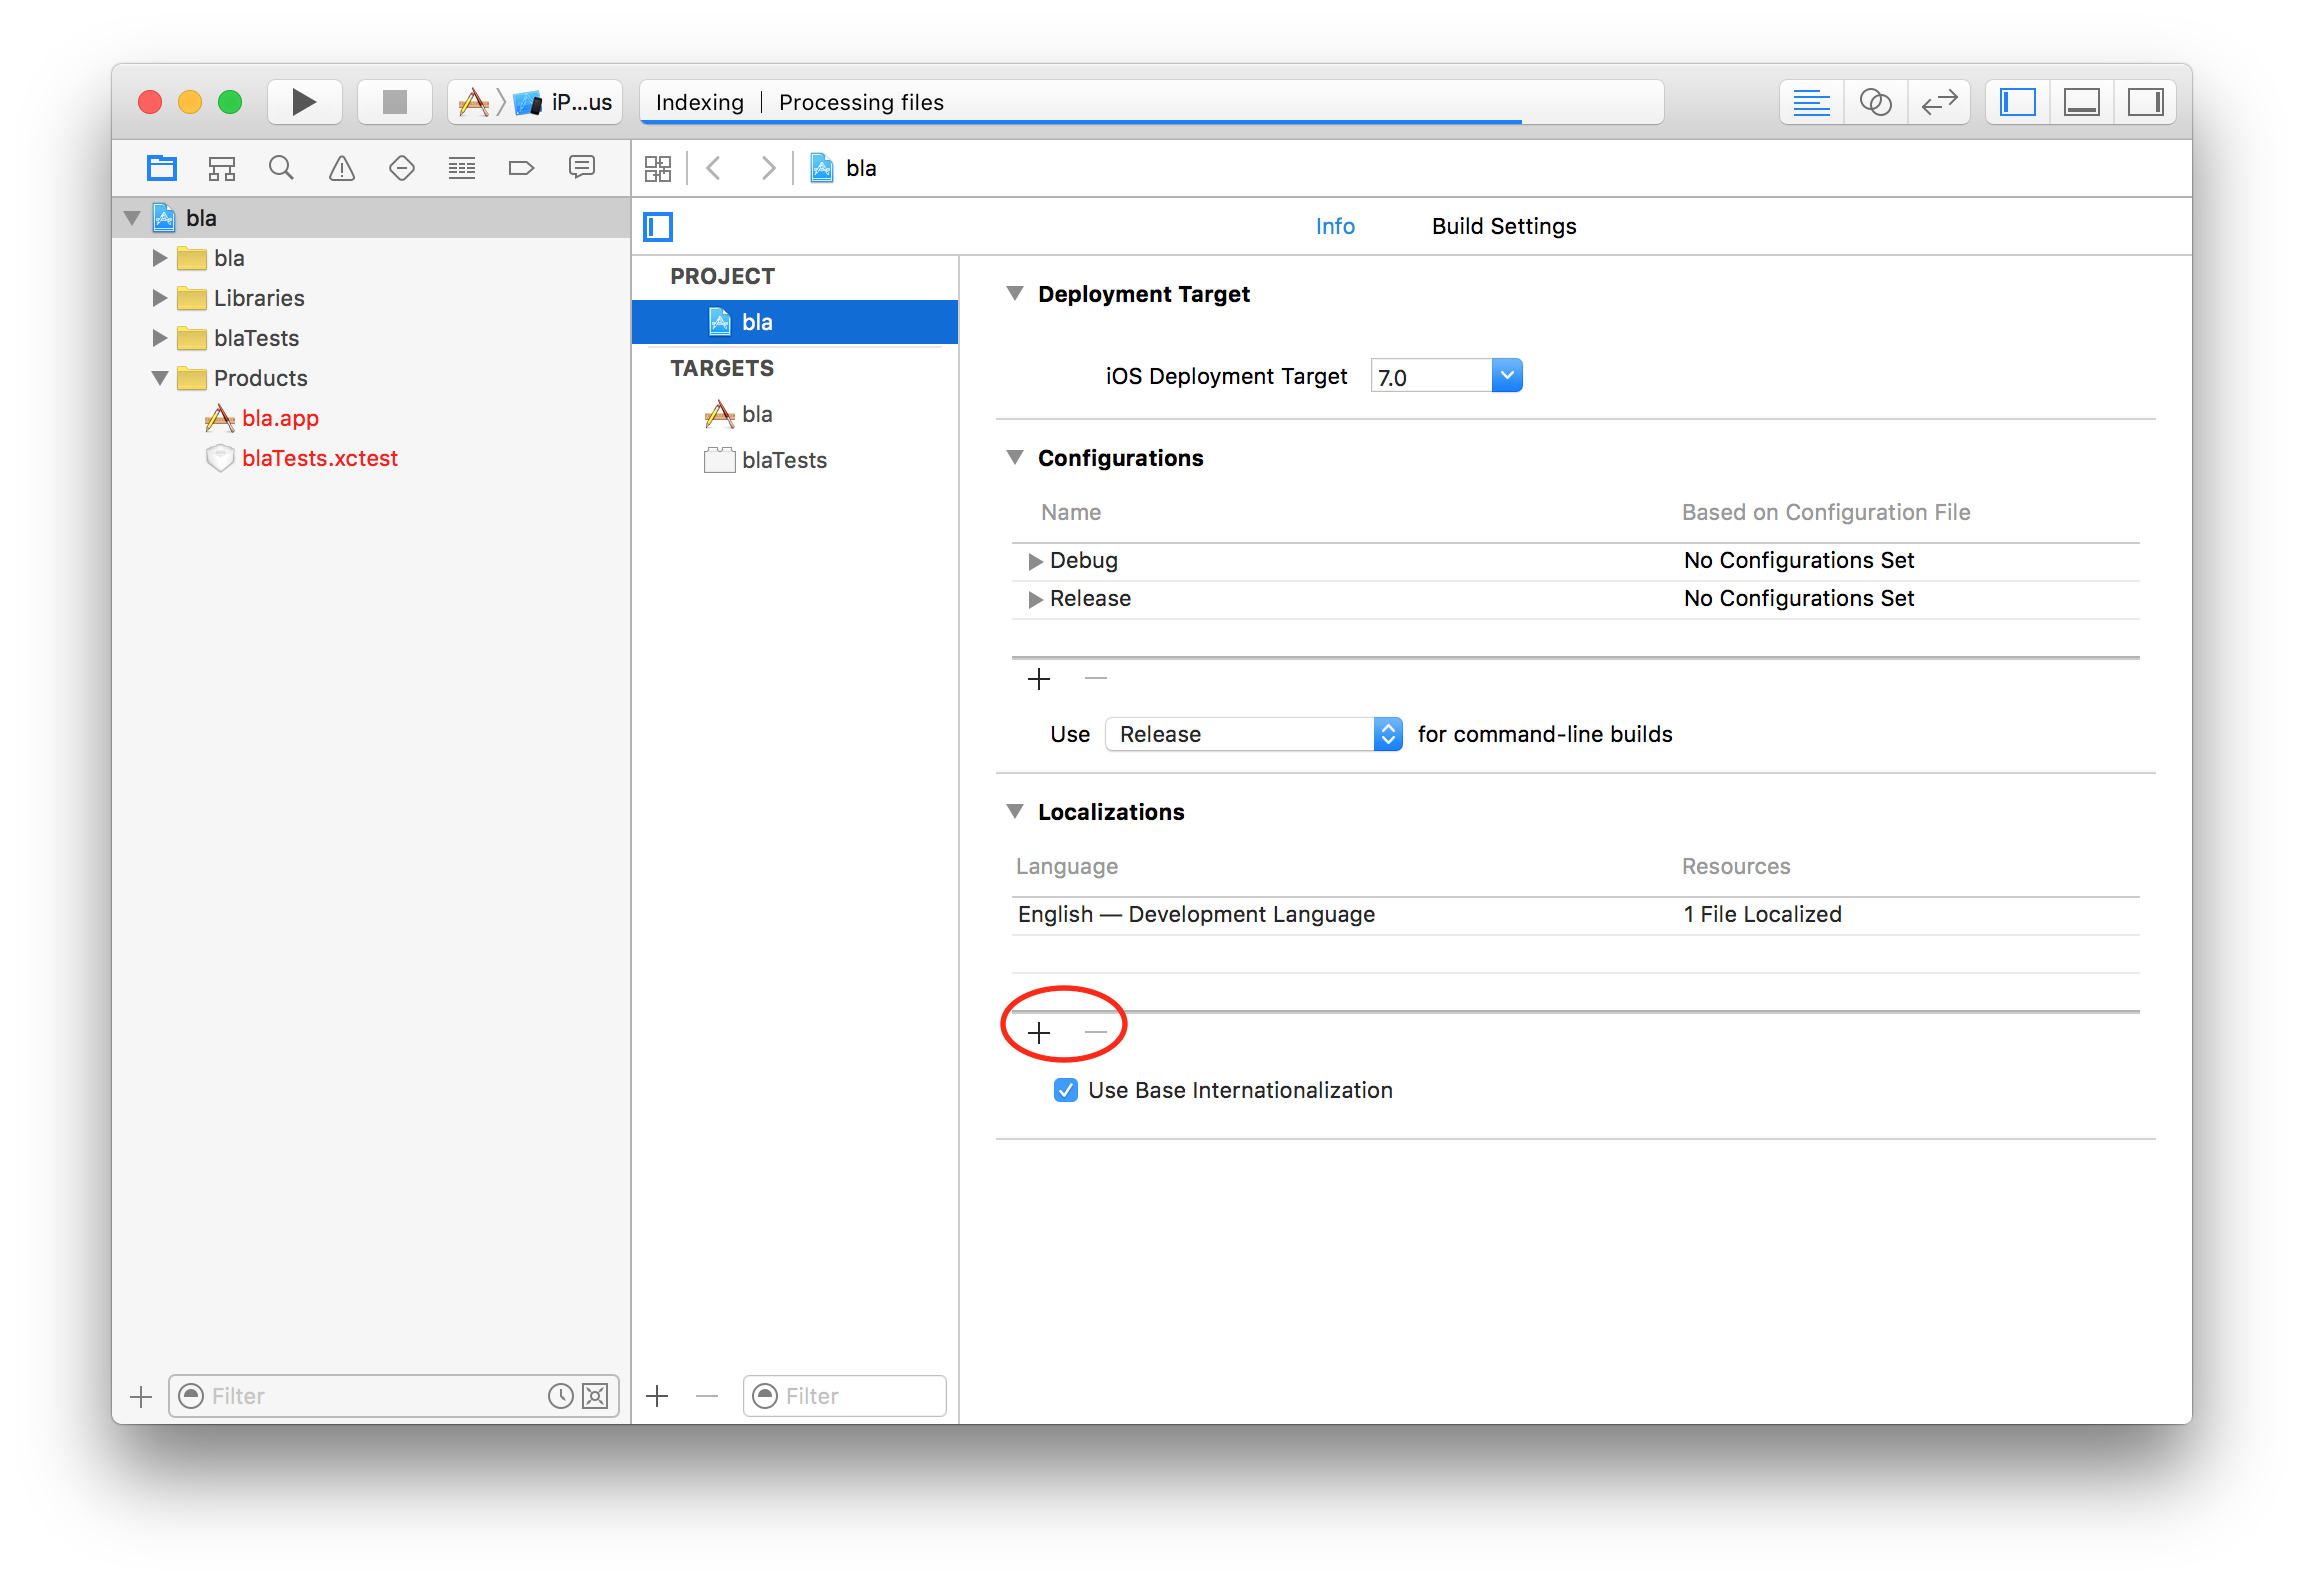
You also need to add the localizations you intend to support to your iOS project. To do that open your Xcode project:
$ open <your-project>.xcodeproj
And add the localizations you will support as shown here:
Android
Add react-native-i18n to your ./android/settings.gradle file as follows:
include ':app', ':react-native-i18n'project(':react-native-i18n').projectDir = new File(rootProject.projectDir, '../node_modules/react-native-i18n/android')Include it as dependency in ./android/app/build.gradle file:
dependencies { // ... compile project(':react-native-i18n')}Finally, you need to add the package to your MainApplication (./android/app/src/main/java/your/bundle/MainApplication.java):
// <-- Add to ReactNativeI18n to the imports // ... @Overrideprotected List<ReactPackage> { return Arrays.<ReactPackage>;} // ... After that, you will need to recompile your project with react-native run-android.
⚠️ Important: You'll need to install Android build tools 27.0.3
Usage
;// OR const I18n = require('react-native-i18n').default Component { return <Text>I18n</Text>; } // Enable fallbacks if you want `en-US` and `en-GB` to fallback to `en`I18nfallbacks = true; I18ntranslations = en: greeting: 'Hi!' fr: greeting: 'Bonjour!' ;This will render Hi! for devices with the English locale, and Bonjour! for devices with the French locale.
Usage with multiple location files
// app/i18n/locales/en.js greeting: 'Hi!'; // app/i18n/locales/fr.js greeting: 'Bonjour!'; // app/i18n/i18n.js ;;; I18nfallbacks = true; I18ntranslations = en fr; ; // usage in component ; Component { return <Text>I18n</Text> }Fallbacks
When fallbacks are enabled (which is generally recommended), i18n.js will try to look up translations in the following order (for a device with en_US locale):
- en-US
- en
Note: iOS 8 locales use underscored (en_US) but i18n.js locales are dasherized (en-US). This conversion is done automatically for you.
I18nfallbacks = true; I18ntranslations = en: greeting: 'Hi!' 'en-GB': greeting: 'Hi from the UK!' ;For a device with a en_GB locale this will return Hi from the UK!', for a device with a en_US locale it will return Hi!.
Device's locales
You can get the user preferred locales with the getLanguages method:
; ;I18n.js documentation
For more info about I18n.js methods (localize, pluralize, etc) and settings see its documentation.
Licence
MIT