sprinkler.js
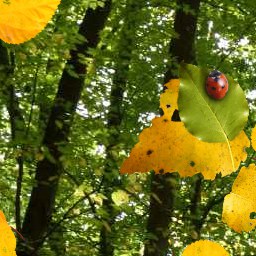
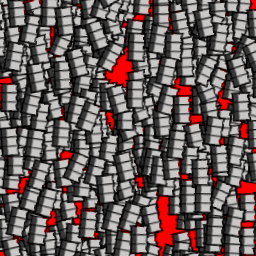
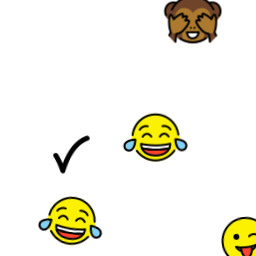
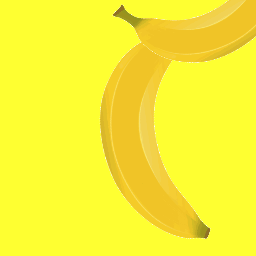
With Sprinkler you can create an image rain on canvas and visualize and simulate streams, flows, rates, and distributions. Give it a canvas element and a list of image URLs and call start() to make it animate dropping particles e.g. bananas or frogs or anything you can imagine. There are lots of parameters to tweak particle generation, movement and transparency. Have fun!
Compatible with all the browsers that support canvas.
Example apps
Quick start
Copy the following code to a new HTML file, for example oranges.html. Also, download the image orange.png and save it next to the HTML file. Now you have a rain of delicious oranges!
<!DOCTYPE html>
<html>
  <head>
    <meta charset="utf-8"/>
    <meta name="viewport" content="width=device-width, initial-scale=1"/>
    <title>My First Sprinkler Animation</title>
    <style>
      body { background: yellow; }
    </style>
</head>
<body>
  <canvas id="canvas" width="640" height="640"></canvas>
  <script src="https://unpkg.com/sprinkler@1.12.0/dist/sprinkler.min.js"></script>
  <script>
    var el = document.getElementById('canvas')
    var rain = sprinkler.create(el)

    // A list of your images
    var images = [
      'orange.png',
    ]

    // Start the animation
    rain.start(images, {
      imagesInSecond: 10,         // Particles per second
      burnInSeconds: 30,          // Animation prerun fills the canvas.
      zMin: 0.2, zMax: 1,         // Range of initial particle sizes
      rMin: 0, rMax: 2 * Math.PI, // Range of initial particle rotations
      aMin: 1, aMax: 1,           // Range of initial alpha/opacity
      dxMin: -1, dxMax: 1,        // Range of horizontal speeds (spread)
      dyMin: 200, dyMax: 200,     // Range of vertical speeds (fall px/sec)
      dzMin: 0, dzMax: 0,         // Range of growing speeds
      drMin: -1, drMax: 1,        // Range of rotation speeds
      daMin: 0, daMax: 0,         // Range of opacity changing speed
      // See docs for advanced animation parameters
    })
  </script>
</body>
</html>
Installation
Browsers
<script src="https://unpkg.com/sprinkler@1.12.0/dist/sprinkler.min.js"></script>
<script>
  var el = document.getElementById('canvas')
  var rain = sprinkler.create(el)
  ...
CommonJS & Node.js
Install via npm:
$ npm install sprinkler
---
var sprinkler = require('sprinkler')
AMD & Require.js
define(['scripts/sprinkler'], function (sprinkler) { ... });
API
sprinkler.create(canvasElement, options)
var rain = sprinkler.create(el)
Create a sprinkler animation on the given canvas.
Optional options object can take the following properties:
-
responsive,trueby default. Whentruethen canvas element pixel size follows its styled size. This prevents browsers from scaling the canvas. That gives us full 1:1 canvas-screen pixel ratio. Setfalseto stop sprinkler resizing your canvas element. -
postAnimationFrame, a function. If specified, called after every animation loop render step. Allows usage of CCapture to record the animation frame by frame and produce a high-quality video. -
renderingStrategy, an object to customize simulation speed versus frame rate for video capturing purposes. Defaults to{ type: 'auto', speedMultiplier: 1 }. The type'auto'enables dynamic frame rate by usingwindow.requestAnimationFrameunder the hood. If you need to have slow and steady frame rate of 500 ms per frame but advance the simulation only 33 ms each frame, then use the rendering strategy{ type: 'fixed', simulatedInterval: 33, frameInterval: 500 }.
start(imageUrls, options)
var stop = rain.start(imageUrls, { ... })
Start the animation. Animation downloads the images in a lazy manner: instead of downloading all the images as soon as possible, it downloads an image when the image is dropped to the canvas as an particle. This feature allows you to specify even a large number of different images. Our current record is 3300.
The function takes in imageUrls which can be an array of URL strings OR a distribution object. If an array is given, the URLs are sampled uniformly:
var imageUrls = [
  'img/banana.png',
  'img/orange.png'
]
Instead, if a distribution object is given, where URL strings are the keys and their numerical weights are the values, then the images with higher weights appear more often:
var imageUrls = {
  'img/banana.png': 4,
  'img/orange.png': 1
}
The second parameter options is optional object which describes the style of the animation. See below for possibilities.
The start function returns a stop function that stops the particle generation. Sprinkler allows you to run multiple start calls, also called waves, concurrently without stopping any.
The optional options object can take the following properties:
-
angle, the main direction of the particle flow in radians. Top to bottom is0, left to right isMath.PI / 2. Defaults to0. This rotates the base x- and y-axis so you do not need to re-adjust other parameters. -
imagesInSecond, an average number of dropped images in a second per 1000 pixels of width. Bound to the width to keep the density the same regardless the canvas size. To let density change but the number of images stay constant instead, seeconstantDensity. -
constantDensity, a boolean. Defaults totrue. Setfalseto keep image rate constant and allow density to change when the canvas size changes. -
burnInSeconds, number of seconds to prerun the wave. This allows there to be visible particles already at the beginning. To get an instant feeling of a consistent flow, set higher than what it would take for a particle to fall through the canvas. -
zMinandzMax, range for initial scale. Between [0, 1] -
rMinandrMax, range for initial rotation. Between [0, 2*Math.PI] -
aMinandaMax, range for initial transparency (alpha). Between [0, 1] -
dxMinanddxMax, range for horizontal velocity. Between [-Inf, Inf] -
dyMinanddyMax, range for vertical velocity. Between [0, Inf] -
dzMinanddzMax, range for scale velocity. Between [-Inf, Inf] -
drMinanddrMax, range for rotation velocity. Between [-Inf, Inf] -
daMinanddaMax, range for transparency velocity. Between [-Inf, Inf] -
ddxMinandddxMax, range for horizontal acceleration. Between [-Inf, Inf] -
ddyMinandddyMax, range for vertical acceleration. Between [0, Inf] -
ddzMinandddzMax, range for scale acceleration. Between [-Inf, Inf] -
ddrMinandddrMax, range for rotation acceleration. Between [-Inf, Inf] -
ddaMinandddaMax, range for transparency acceleration. Between [-Inf, Inf]
Values are picked randomly but uniformly from the given ranges.
Default values are:
var options = {
  angle: 0,
  imagesInSecond: 7,
  burnInSeconds: 0,
  zMin: 0.38, zMax: 1,
  rMin: 0, rMax: 2 * Math.PI,
  aMin: 1, aMax: 1,
  dxMin: -1, dxMax: 1,
  dyMin: 100, dyMax: 100,
  dzMin: 0, dzMax: 0,
  drMin: -1, drMax: 1,
  daMin: 0, daMax: 0,
  ddxMin: 0, ddxMax: 0,
  ddyMin: 0, ddyMax: 0,
  ddzMin: 0, ddzMax: 0,
  ddrMin: 0, ddrMax: 0,
  ddaMin: 0, ddaMax: 0
}
There are a few experimental options. See the examples for usage.
-
clickModifier: a particle manipulation function that gets called when the particle becomes clicked. -
particleRenderer: a custom particle renderer function. Allows you to render complex shapes. -
particleSize: a custom particle size function to be used mainly with a customparticleRenderer. -
tail: additional particles that follow their parent particle. -
xOff: a number. Moves the particle spawning line along x-axis. Especially useful withxSteps. -
xSteps: integer. Restrict the continuous particle spawning line to N discrete points. For example, can be used to create car lanes.
drop(imageUrls, options)
rain.drop(imageUrls, { ... })
Drops a single particle. In other aspects it behaves like start(...) and takes in the same arguments. Does not return a stop function as there is nothing to stop.
on(eventName, callback)
rain.on('particle-created', (particle) => { ... })
Subscribes an listener to an event. Available events emitted by the rain are:
- 'particle-created'. Calls
callback(particle).
stop()
var stop = rain.start(imageUrls, options)
A stop function is returned by a start call. It ends the particle generation initiated by the start. For example, combine setTimeout with stop to generate short bursts of particles:
setTimeout(stop, 2000)
Notes for developers
Run tests with $ npm test.
Build with $ npm run build.
Serve with $ npm start.
Versioning
License
This is MIT Licensed software. See the source code in GitHub.


