d3-voronoi-map
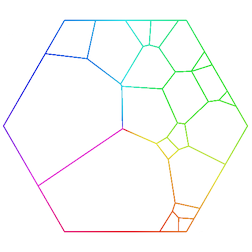
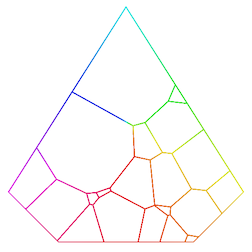
This D3 plugin produces a Voronoï map (i.e. one-level treemap). Given a convex polygon and weighted data, it tesselates/partitions the polygon in several inner cells, such that the area of a cell represents the weight of the underlying datum.
Because a picture is worth a thousand words:
Available for d3 v4, d3 v5 and d3 v6.
If you're interested on multi-level treemap, which handle nested/hierarchical data, take a look at the d3-voronoi-treemap plugin.
Context
D3 already provides a d3-treemap module which produces a rectangular treemap. Such treemaps could be distorted to fit shapes that are not rectangles (cf. Distorded Treemap - d3-shaped treemap).
This plugin allows to compute a map with a unique look-and-feel, where inner areas are not strictly aligned each others, and where the outer shape can be any hole-free convex polygons (square, rectangle, pentagon, hexagon, ... any regular convex polygon, and also any non regular hole-free convex polygon).
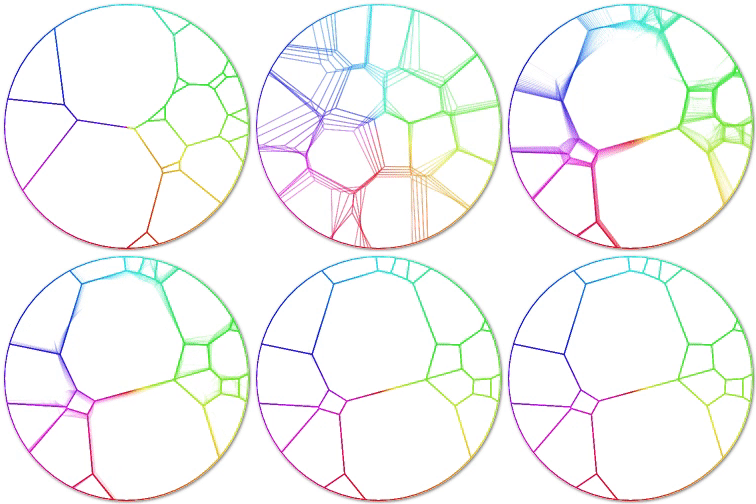
The computation of the Voronoï map is based on a iteration/looping process. Hence, obtaining the final partition requires some iterations/some times, depending on the number and type of data/weights, the desired representativeness of cell areas.
As the d3-force layout does, this module can be used in two ways :
- live Voronoï map: displays the evolution of the self-organizing Voronoï map; each iteration is displayed, with some delay between iterations so that the animation is appealing to human eyes;
- static Voronoï map: displays only the final most representative Voronoï map, which is faster than the live use case; intermediate iterations are silently computed, one after each other, without any delay.
The rest of this README gives some implementatiton details and example on these two use cases.
Examples
-
Real life use cases
- Democratic Primaries: Preferential Poll Results by Nadieh Bremer in Swayable, with animated Voronoï maps (more details at https://www.visualcinnamon.com/portfolio/swayable-preferential-polling)
- The Battleground States Biden and Trump Need to Win 270 by in The New York Times, with interactive and playful Voronoï maps
- Land of colors by Tristan Guillevin in Tableau, with small multiples Voronoï maps
-
Examples with available code
- The Individual Costs of Being Obese in the U.S. (2010), a remake of HowMuch.net's post
- a simple example explains how to switch from a live arrangement to a static arrangement
- a simple example and Global Population by Region by 1950 to 2100 - a remake explain how to update and animate an existing arrangement
Installing
If you use NPM, npm install d3-voronoi-map and import it with
import { voronoiMapSimulation } from 'd3-voronoi-map';Otherwise, load https://rawcdn.githack.com/Kcnarf/d3-voronoi-map/v2.1.1/build/d3-voronoi-map.js (or its d3-voronoi-map.min.js version) to make it available in AMD, CommonJS, or vanilla environments. In vanilla, you must load the d3-weighted-voronoi plugin prior to this one, and a d3 global is exported:
<script src="https://d3js.org/d3.v6.min.js"></script>
<script src="https://rawcdn.githack.com/Kcnarf/d3-weighted-voronoi/v1.1.3/build/d3-weighted-voronoi.js"></script>
<script src="https://rawcdn.githack.com/Kcnarf/d3-voronoi-map/v2.1.1/d3-voronoi-map.js"></script>
<script>
  var simulation = d3.voronoiMapSimulation(data);
</script>
If you're interested in the latest developments, you can use the master build, available throught:
<script src="https://raw.githack.com/Kcnarf/d3-voronoi-map/master/build/d3-voronoi-map.js"></script>TL;DR;
In your javascript, if you want to display a live Voronoï map (i.e. displays the evolution of the self-organizing Voronoï map) :
var simulation = d3.voronoiMapSimulation(data)
  .weight(function(d){ return weightScale(d); }           // set the weight accessor
  .clip([[0,0], [0,height], [width, height], [width,0]])  // set the clipping polygon
  .on ("tick", ticked);                                   // function 'ticked' is called after each iteration

function ticked() {
  var state = simulation.state(),                         // retrieve the simulation's state, i.e. {ended, polygons, iterationCount, convergenceRatio}
      polygons = state.polygons,                          // retrieve polygons, i.e. cells of the current iteration
      drawnCells;

  drawnCells = d3.selectAll('path').data(polygons);       // d3's join
  drawnCells
    .enter().append('path')                               // create cells at first render
    .merge(drawnCells);                                   // assigns appropriate shapes and colors
      .attr('d', function(d) {
        return cellLiner(d) + 'z';
      })
      .style('fill', function(d) {
        return fillScale(d.site.originalObject);
      });
}
Or, if you want to display only the static Voronoï map (i.e. display the final most representative arrangement):
var simulation = d3.voronoiMapSimulation(data)
  .weight(function(d){ return weightScale(d); }           // set the weight accessor
  .clip([[0,0], [0,height], [width, height], [width,0]])  // set the clipping polygon
  .stop();                                                // immediately stops the simulation

var state = simulation.state();                           // retrieve the simulation's state, i.e. {ended, polygons, iterationCount, convergenceRatio}

while (!state.ended) {                                    // manually launch each iteration until the simulation ends
  simulation.tick();
  state = simulation.state();
}

var polygons = state.polygons;                            // retrieve polygons, i.e. cells of the final Voronoï map

d3.selectAll('path').data(polygons);                      // d3's join
  .enter()                                                // create cells with appropriate shapes and colors
    .append('path')
    .attr('d', function(d) {
      return cellLiner(d) + 'z';
    })
    .style('fill', function(d) {
      return fillScale(d.site.originalObject);
    });
Reference
- based on Computing Voronoï Treemaps - Faster, Simpler, and Resolution-independent
- https://github.com/ArlindNocaj/power-voronoi-diagram for a Java implementation
API
# d3.voronoiMapSimulation(data)
Creates a new simulation with the specified array of data, and the default accessors and configuration values (weight, clip, convergenceRatio, maxIterationCount, minWeightRatio, prng, initialPosition, and initialWeight).
The simulation starts automatically. For a live Voronoï map, use simulation.on to listen for tick events as the simulation runs, and end event when the simulation finishes. See also TL;DR; live Voronoï map.
For a static Voronoï map, call simulation.stop, and then call simulation.tick as desired. See also TL;DR; static Voronoï map.
# simulation.state()
Returns a hash of the current state of the simulation.
hash.polygons is a sparse array of polygons clipped to the clip-ping polygon, one for each cell (each unique input point) in the diagram. Each polygon is represented as an array of points [x, y] where x and y are the point coordinates, a site field that refers to its site (ie. with x, y and weight retrieved from the original data), and a site.originalObject field that refers to the corresponding element in data (specified in d3.voronoiMapSimulation(data)). Polygons are open: they do not contain a closing point that duplicates the first point; a triangle, for example, is an array of three points. Polygons are also counterclockwise (assuming the origin ⟨0,0⟩ is in the top-left corner).
Furthermore :
- the positive integer hash.iterationCount is the current iteration count;
- the floating number hash.convergenceRatio is the current convergence ratio (ie. cell area errors / area of the clip-ping polygon);
- the boolean hash.ended indicates if the current iteration is the final one, or if the simulation requires more iterations to complete.
# simulation.weight([weight])
If weight-accessor is specified, sets the weight accessor. If weight is not specified, returns the current weight accessor, which defaults to:
function weight(d) {
  return d.weight;
}
# simulation.clip([clip])
If clip is specified, sets the clipping polygon, compute the adequate extent and size, and returns this layout. clip defines a hole-free convex polygon, and is specified as an array of 2D points [x, y], which must be (i) open (no duplication of the first D2 point) and (ii) counterclockwise (assuming the origin ⟨0,0⟩ is in the top-left corner). If clip is not specified, returns the current clipping polygon, which defaults to:
[
  [0, 0],
  [0, 1],
  [1, 1],
  [1, 0],
];
# simulation.extent([extent])
If extent is specified, it is a convenient way to define the clipping polygon as a rectangle. It sets the extent, computes the adequate clipping polygon and size, and returns this layout. extent must be a two-element array of 2D points [x, y], which defines the clipping polygon as a rectangle with the top-left and bottom-right corners respectively set to the first and second points (assuming the origin ⟨0,0⟩ is in the top-left corner on the screen). If extent is not specified, returns the current extent, which is [[minX, minY], [maxX, maxY]] of current clipping polygon, and defaults to:
[
  [0, 0],
  [1, 1],
];
# simulation.size([size])
If size is specified, it is a convenient way to define the clipping polygon as a rectangle. It sets the size, computes the adequate clipping polygon and extent, and returns this layout. size must be a two-element array of numbers [width, height], which defines the clipping polygon as a rectangle with the top-left corner set to [0, 0]and the bottom-right corner set to [width, height](assuming the origin ⟨0,0⟩ is in the top-left corner on the screen). If size is not specified, returns the current size, which is [maxX-minX, maxY-minY] of current clipping polygon, and defaults to:
[1, 1];# simulation.convergenceRatio([convergenceRatio])
If convergenceRatio is specified, sets the convergence ratio, which stops simulation when (cell area errors / (clip-ping polygon area) <= convergenceRatio. If convergenceRatio is not specified, returns the current convergenceRatio , which defaults to:
var convergenceRation = 0.01; // stops computation when cell area error <= 1% clipping polygon's areaThe smaller the convergenceRatio, the more representative is the final map, the longer the simulation takes time.
# simulation.maxIterationCount([maxIterationCount])
If maxIterationCount is specified, sets the maximum allowed number of iterations, which stops simulation when it is reached, even if the convergenceRatio is not reached. If maxIterationCount is not specified, returns the current maxIterationCount , which defaults to:
var maxIterationCount = 50;If you want to wait until simulation stops only when the convergenceRatio is reached, just set the maxIterationCount to a large amount. Be warned that simulation may take a huge amount of time, due to flickering behaviours in later iterations.
# simulation.minWeightRatio([minWeightRatio])
If minWeightRatio is specified, sets the minimum weight ratio, which allows to compute the minimum allowed weight (= maxWeight * minWeightRatio). If minWeightRatio is not specified, returns the current minWeightRatio , which defaults to:
var minWeightRatio = 0.01; // 1% of maxWeightminWeightRatio allows to mitigate flickerring behaviour (caused by too small weights), and enhances user interaction by not computing near-empty cells.
# simulation.prng([prng])
If prng is specified, sets the pseudorandom number generator which is used when randomness is required (e.g. in d3.voronoiMapInitialPositionRandom(), cf. initialPosition). The given pseudorandom number generator must implement the same interface as Math.random and must only return values in the range [0, 1[. If prng is not specified, returns the current prng , which defaults to Math.random.
prng allows to handle reproducibility. Considering the same set of data, severall Voronoï map computations lead to disctinct final arrangements, due to the non-seedable Math.random default number generator. If prng is set to a seedable pseudorandom number generator which produces repeatable outputs, then several computations will produce the exact same final arrangement. This is useful if you want the same arrangement for distinct page loads/reloads. For example, using seedrandom:
<script src="//cdnjs.cloudflare.com/ajax/libs/seedrandom/2.4.3/seedrandom.min.js"></script>
<script>
  var myseededprng = new Math.seedrandom('my seed'); // (from seedrandom's doc) Use "new" to create a local pprng without altering Math.random
  voronoiMap.prng(myseededprng);
</script>
You can also take a look at d3-random for random number generator from other-than-uniform distributions.
# simulation.initialPosition([initialPosition])
If initialPosition is specified, sets the initial coordinate accessor. The accessor is a callback wich is passed the datum, its index, the array it comes from, and the current simulation. The accessor must provide an array of two numbers [x, y] inside the clipping polygon, otherwise a random initial position is used instead. If initialPosition is not specified, returns the current accessor, which defaults to a random position policy which insure to randomly pick a point inside the clipping polygon.
A custom accessor may look like:
function precomputedInitialPosition(d, i, arr, simulation) {
  return [d.precomputedX, d.precomputedY];
}
Furthermore, two predefined policies are available:
- the random policy, available through
d3.voronoiMapInitialPositionRandom(), which is the default intital position policy; it uses the specified prng, and may produce repeatable arrangement if a seeded random number generator is defined; - the pie-based policy, available through
d3.voronoiMapInitialPositionPie()which initializes positions of data along an inner circle of the clipping polygon, in an equaly distributed counterclockwise way (reverse your data to have a clockwise counterpart); the first datum is positioned at 0 radian (i.e. at right), but this can be customized through thed3.voronoiMapInitialPositionPie().startAngle(<yourFavoriteAngleInRad>)API; the name of this policy comes from the very first iteration which looks like a pie;
You can take a look at these policies to define your own complex initial position policies/accessors.
# voronoiMap.initialWeight([initialWeight])
If initialWeight is specified, sets the initial weight accessor. The accessor is a callback wich is passed the datum, its index, the array it comes from, and the current simulation. The accessor must provide a positive amount. If initialWeight is not specified, returns the current accessor, which defaults to initialize all sites with the same amount (which depends on the clipping polygon and the number of data):
A custom accessor may look like:
function precomputedInitialWeight(d, i, arr, simulation) {
  return d.precomputedWeight;
}
Furthermore, the default half average area policy is available through d3.voronoiMapInitialWeightHalfAverageArea().
Considering a unique clipping polygon where you want animate the same set of data but with evolving weights (e.g., animate according to passing time), this API combined with the initialPosition API allows you to maintain areas from one set to another:
- first, compute the Voronoï map of a first set of data
- then, compute the Voronoï map of another set of data, by initializing sites to the final values (positions and weights) of first Voronoï map
See Update and Animate a Voronooï map or Global Population by Region from 1950 to 2100 - a remake for live examples.
# simulation.stop()
Stops the simulation’s internal timer, if it is running, and returns the simulation. If the timer is already stopped, this method does nothing. This method is useful to display only a static Voronoï map. In such a case, you have to stop the simulation, and run it manually till its end with simulation.tick (see also TL;DR; static Voronoï map).
# simulation.tick()
If the simulation is not ended, computes a more representative Voronoï map by adapting the one of the previous iteration, and increments the current iteration count. If the simulation is ended, it does nothing.
This method does not dispatch events; events are only dispatched by the internal timer when the simulation is started automatically upon creation or by calling simulation.restart.
This method can be used in conjunction with simulation.stop to compute a static Voronoï map (see also TL;DR; static Voronoï map). For large graphs, static layouts should be computed in a web worker to avoid freezing the user interface.
# simulation.restart()
Restarts the simulation’s internal timer and returns the simulation. This method can be used to resume the simulation after temporarily pausing it with simulation.stop.
# simulation.on(typenames, [listener])
If listener is specified, sets the event listener for the specified typenames and returns this simulation. If an event listener was already registered for the same type and name, the existing listener is removed before the new listener is added. If listener is null, removes the current event listeners for the specified typenames, if any. If listener is not specified, returns the first currently-assigned listener matching the specified typenames, if any. When a specified event is dispatched, each listener will be invoked with the this context as the simulation.
The typenames is a string containing one or more typename separated by whitespace. Each typename is a type, optionally followed by a period (.) and a name, such as tick.foo and tick.bar; the name allows multiple listeners to be registered for the same type. The type must be one of the following:
- tick - after each tick of the simulation’s internal timer.
- end - after the simulation’s timer stops when alpha < alphaMin.
Note that tick events are not dispatched when simulation.tick is called manually when only displaying a [static] Voronoï map; events are only dispatched by the internal timer, and are intended for the live Voronoï map.
See dispatch.on for details.
Migrations
From v1.x.x to v2.x.x
In v1.x.x, the plugin only allows to compute a static Voronoï map. In order to maintain this behaviour with v2.x.x, your should update your code as it is described in TL;DR; static Voronoï map.
Regarding the API:
- all the APIs of v1.x.x are available in v2.x.x
- v2.x.x adds APIs related to the simulation (i.e. simulation.stop, simulation.tick, simulation.restart, simulation.on and simulation.state)
-
simulation.state().polygonsis the new way to retrieve cells.
Dependencies
- d3-dispatch.dispatch
- d3-polygon.{polygonArea, polygonCentroid, polygonContains}
- d3-timer.timer
- d3-weighted-voronoi.weightedVoronoi
Semantic Versioning
d3-voronoi-map attempts to follow semantic versioning and bump major version only when backwards incompatible changes are released.


