gethdev
A development wrapper for Ethereum's geth command.
What is this?
Do you want to run a private Ethereum testnet?
Do you want to automatically mine blocks when there are pending transactions, then pause mining to give your laptop fan a break while you go back to developing your smart contract?
gethdev makes this easy.
gethdev is a small wrapper around the geth command, which automatically sets some parameters to create a private test blockchain, and runs a JavaScript file to automatically create the first account, and start and stop mining as needed.
Mining will be enabled:
- Initially until your default (etherbase) account has been funded with at least 100 ether.
- Every time there are pending transactions, until they have 5 confirmations.
Install gethdev
First, you must install geth (OSX commands below, see link for more information or other platforms):
brew tap ethereum/ethereumbrew install ethereumNext, install gethdev:
npm install -g gethdevCreate a private blockchain
First, make sure you close Ethereum Wallet (Mist), and any other apps which may be running geth in the background.
Then, open a terminal and start gethdev:
gethdevThat's it! You don't need to mess around with creating a custom genesis block file, or manually create your default account.
This will run the command geth --dev js /usr/local/lib/node_modules/gethdev/gethdev.js (using the correct location for gethdev.js on your computer). You will see some output from the command, as geth creates a new private blockchain for you, creates the first account, and begins mining:
I0331 21:16:23.946629   77962 flags.go:504] dev mode enabled
I0331 21:16:23.946822   77962 database.go:71] Alloted 16MB cache to /var/folders/5y/wb6jwkcs0_91r2fnnxg8r69r0000gn/T/ethereum_dev_mode/chaindata
I0331 21:16:23.950721   77962 database.go:71] Alloted 16MB cache to /var/folders/5y/wb6jwkcs0_91r2fnnxg8r69r0000gn/T/ethereum_dev_mode/dapp
I0331 21:16:23.953093   77962 backend.go:314] Protocol Versions: [63 62 61], Network Id: 1
I0331 21:16:23.955382   77962 backend.go:362] Blockchain DB Version: 3
I0331 21:16:23.955437   77962 backend.go:389] ethash used in test mode
I0331 21:16:23.956437   77962 blockchain.go:214] Last header: #0 [e5be9214…] TD=131072
I0331 21:16:23.956474   77962 blockchain.go:215] Last block: #0 [e5be9214…] TD=131072
I0331 21:16:23.956492   77962 blockchain.go:216] Fast block: #0 [e5be9214…] TD=131072
I0331 21:16:23.964205   77962 cmd.go:114] Starting Geth/v1.3.5/darwin/go1.6
I0331 21:16:23.964342   77962 server.go:311] Starting Server
I0331 21:16:23.970381   77962 udp.go:212] Listening, enode://15b903fa2a48566fb73f800f31fe158de2778278e0bf99d8a066e58dd59435ce49f94e1381bc7620ae6e3d221fd61238bb543ebe5fbac5c82090d22066b2e19a@76.102.196.50:63582
I0331 21:16:23.970593   77962 whisper.go:160] Whisper started
I0331 21:16:23.970609   77962 backend.go:526] Server started
I0331 21:16:23.970704   77962 server.go:552] Listening on [::]:60565
I0331 21:16:23.971073   77962 ipc.go:112] IPC service started (/Users/adrian/Library/Ethereum/geth.ipc)
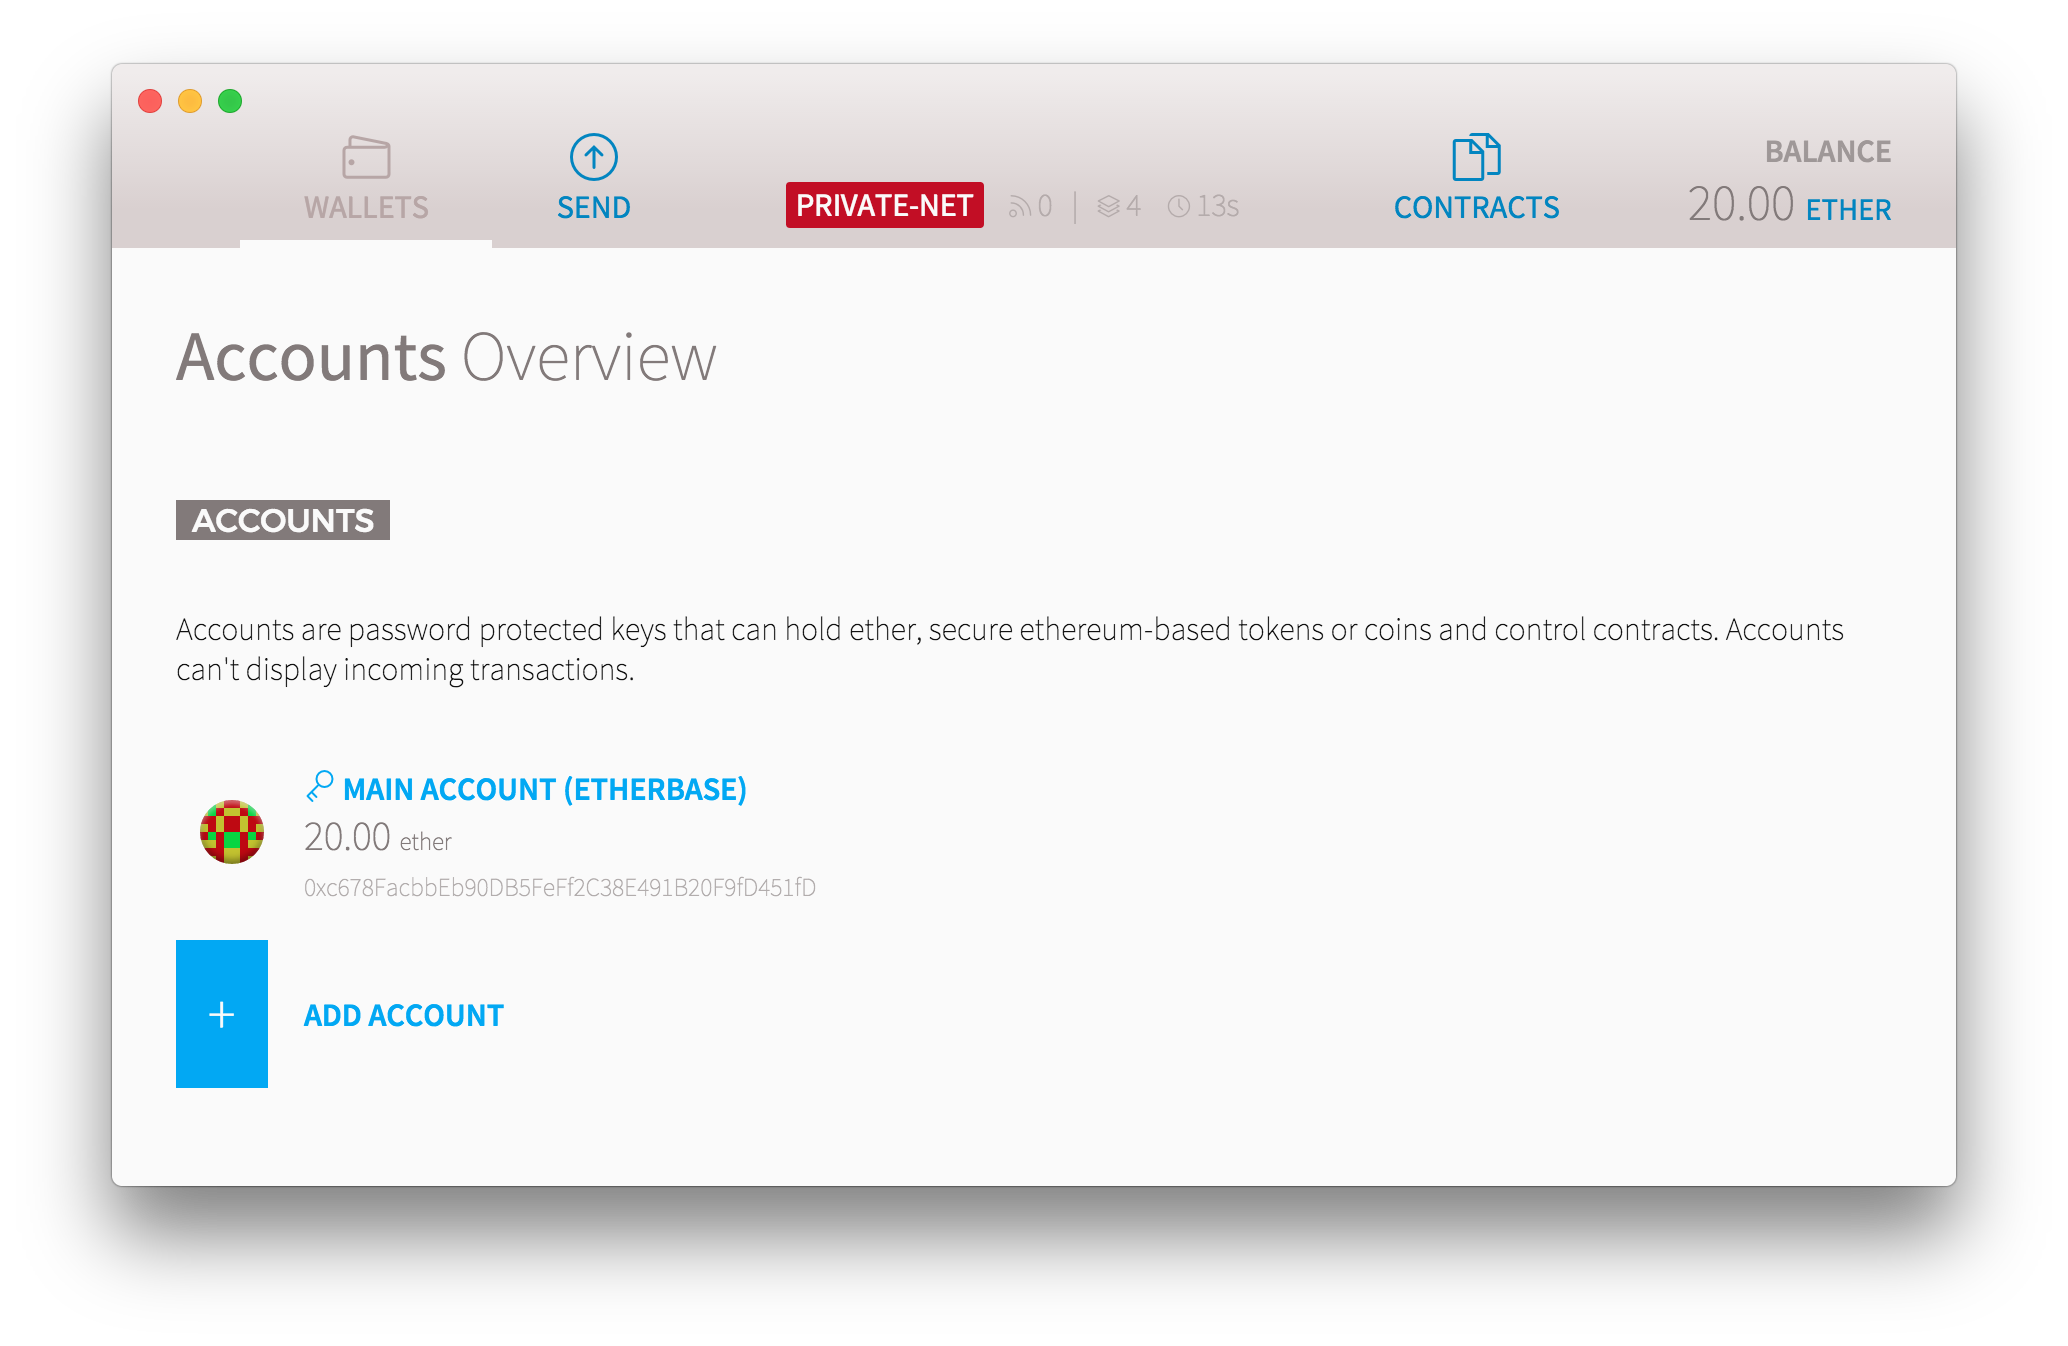
From the output, we can see that geth has started the IPC service at ~/Library/Ethereum/geth.ipc (OSX). This happens to be the default location that Ethereum Wallet (Mist) will try to connect, so now you can go ahead and start up the wallet and you should see it connected to your private testnet, with some ether all ready for you.
NOTE: The blockchain data is stored in a temporary folder by default, such as
/var/folders/5y/wb6jwkcs0_91r2fnnxg8r69r0000gn/T/ethereum_dev_mode. If you wish to specify a custom location for the data, use the--datadircommand line option (see below). When you specify--datadir, it will also move the location of thegeth.ipcfile, so if you still intend to connect to it from Ethereum Wallet, you will need to also specify the IPC path using--ipcpath ~/Library/Ethereum/geth.ipc(or the equivalent path for your platform).
Running custom commands
By default, gethdev will run the command geth js gethdev.js, which will run the auto-mining script. If you want to run custom commands, simply pass them to gethdev and they will be run instead. For example:
gethdev --help # shows help screen gethdev console # runs the default console gethdev --datadir ./data --ipcpath ~/Library/Ethereum/geth.ipc js gethdev.js # specify a custom data directory Note that gethdev.js will automatically be replaced with the full path in the example above.
Attach to a running gethdev
Now that you have gethdev running in one window, you might want to run some commands manually against it. You can do this by opening another terminal, then simply typing:
gethdev attachThis will give you a JavaScript console, attached to the existing running gethdev instance.
I always need to specify heaps of arguments to geth
I feel your pain! Now you can simply set a GETHDEV_OPTS environment variable, and they will be automatically included when you run gethdev.
# add GETHDEV_OPTS to your profile: echo export GETHDEV_OPTS="--port 12345" >> ~/.bash_profile# close and reopen your terminal window, then: gethdevThis will automatically run the command geth --dev --port 12345 js gethdev.js, and save your fingers from RSI.
Why do I need to install this with npm?
You don't! If you want, simply download gethdev.js to your computer, then run it manually by calling:
geth --dev js /path/to/gethdev.jsThe purpose of the npm package is simply to bundle it up and make everything easy for you.
Help, I'm stuck!
Please file a GitHub Issue.